I use n8n for automating various tasks and integrating different services. However, once the workflow is created, I didn’t really keep track of it. Looking at my forwardcents.app account, I realized that I was paying $10 per month for self-hosting n8n. Since I have a Raspberry Pi 4 sitting idle, I decided to set up n8n on it and expose it to the internet using Cloudflare Tunnels. This way, I can run n8n for free on my local hardware while making its workflows accessible globally.
In this tutorial, I will guide you through setting up n8n on a Raspberry Pi and exposing it to the internet securely using Cloudflare Tunnels. This setup allows you to run n8n for free on your local hardware while making its workflows accessible globally, enabling integration with external services like Slack or Telegram.
If you are a visual learner, you can watch the video below where I walk you through the entire process.
Prerequisites
Before you begin, ensure you have the following:
- A Raspberry Pi (RPi) (I used RPi 4 in this tutorial).
- Raspberry Pi Imager installed on your computer to flash the Raspberry Pi OS onto an SD card. You can download it from here.
- A Cloudflare account with a configured domain.
Installing Raspberry Pi OS
To install the Raspberry Pi OS on your Raspberry Pi, follow these steps:
- Connect the SD card to your computer.
- Open the Raspberry Pi Imager application.
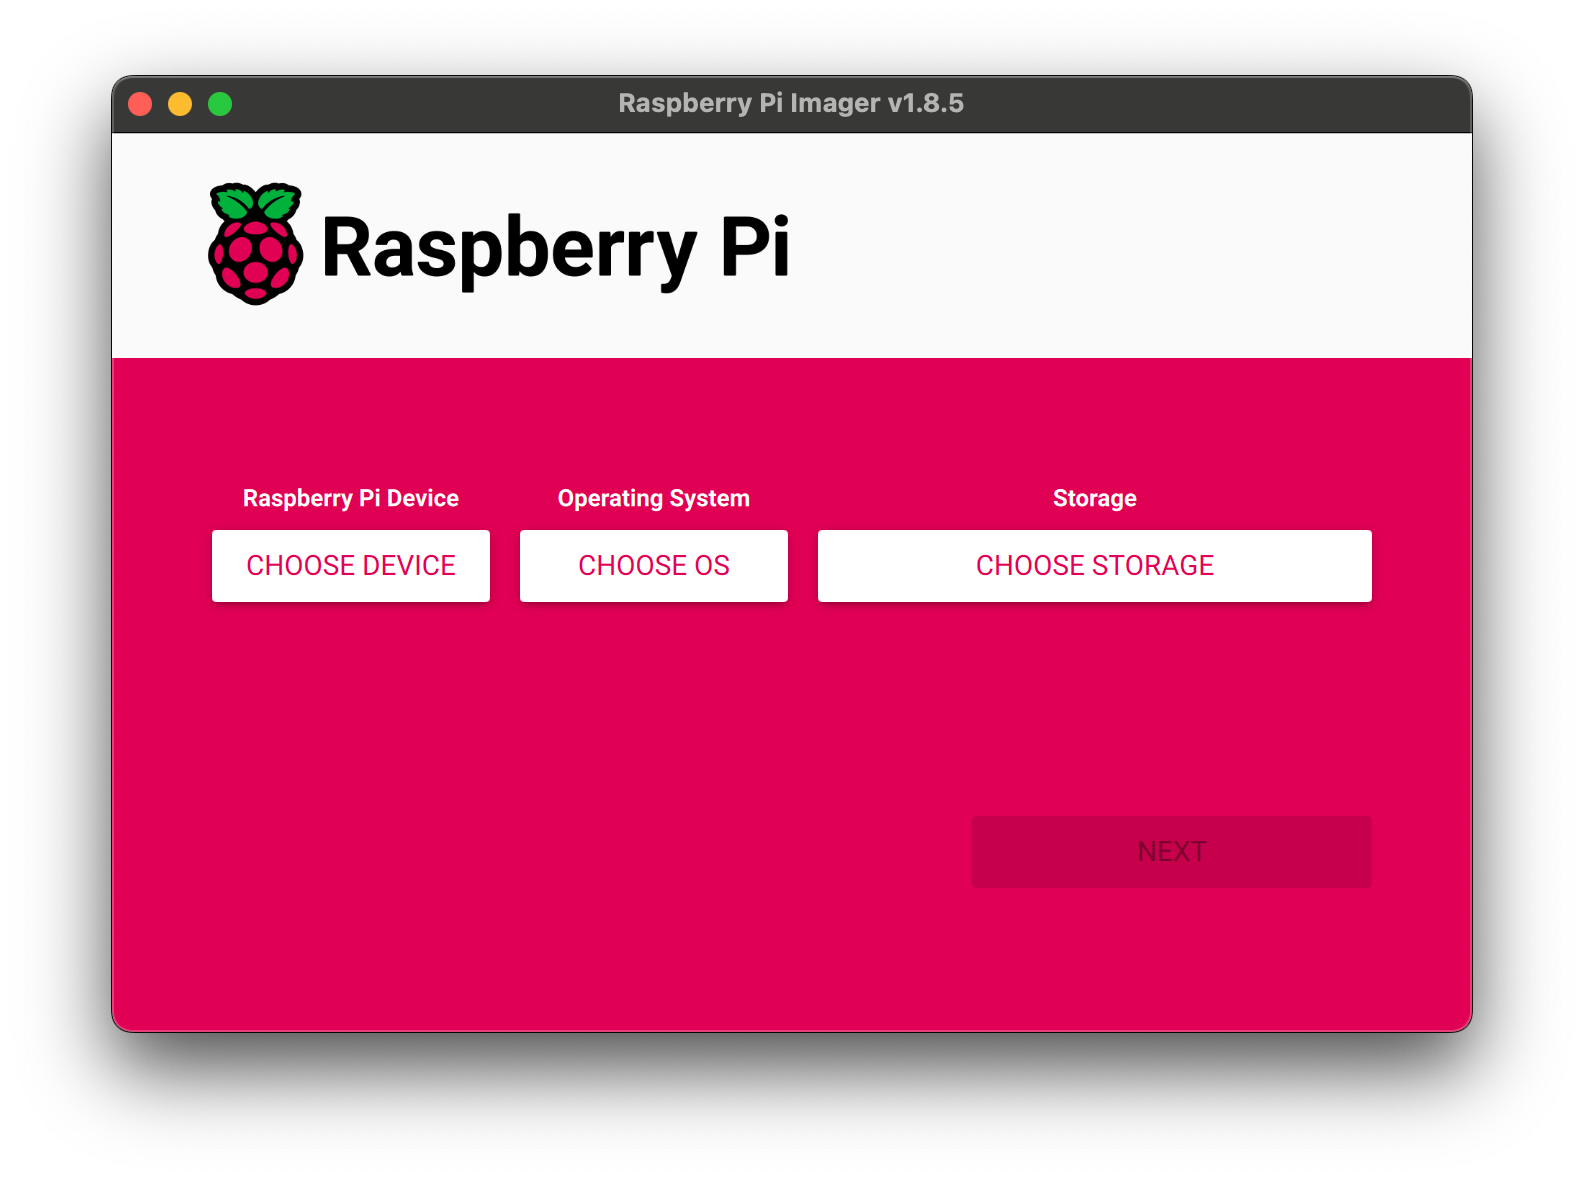
- Click on Choose Device and select your RPi version.

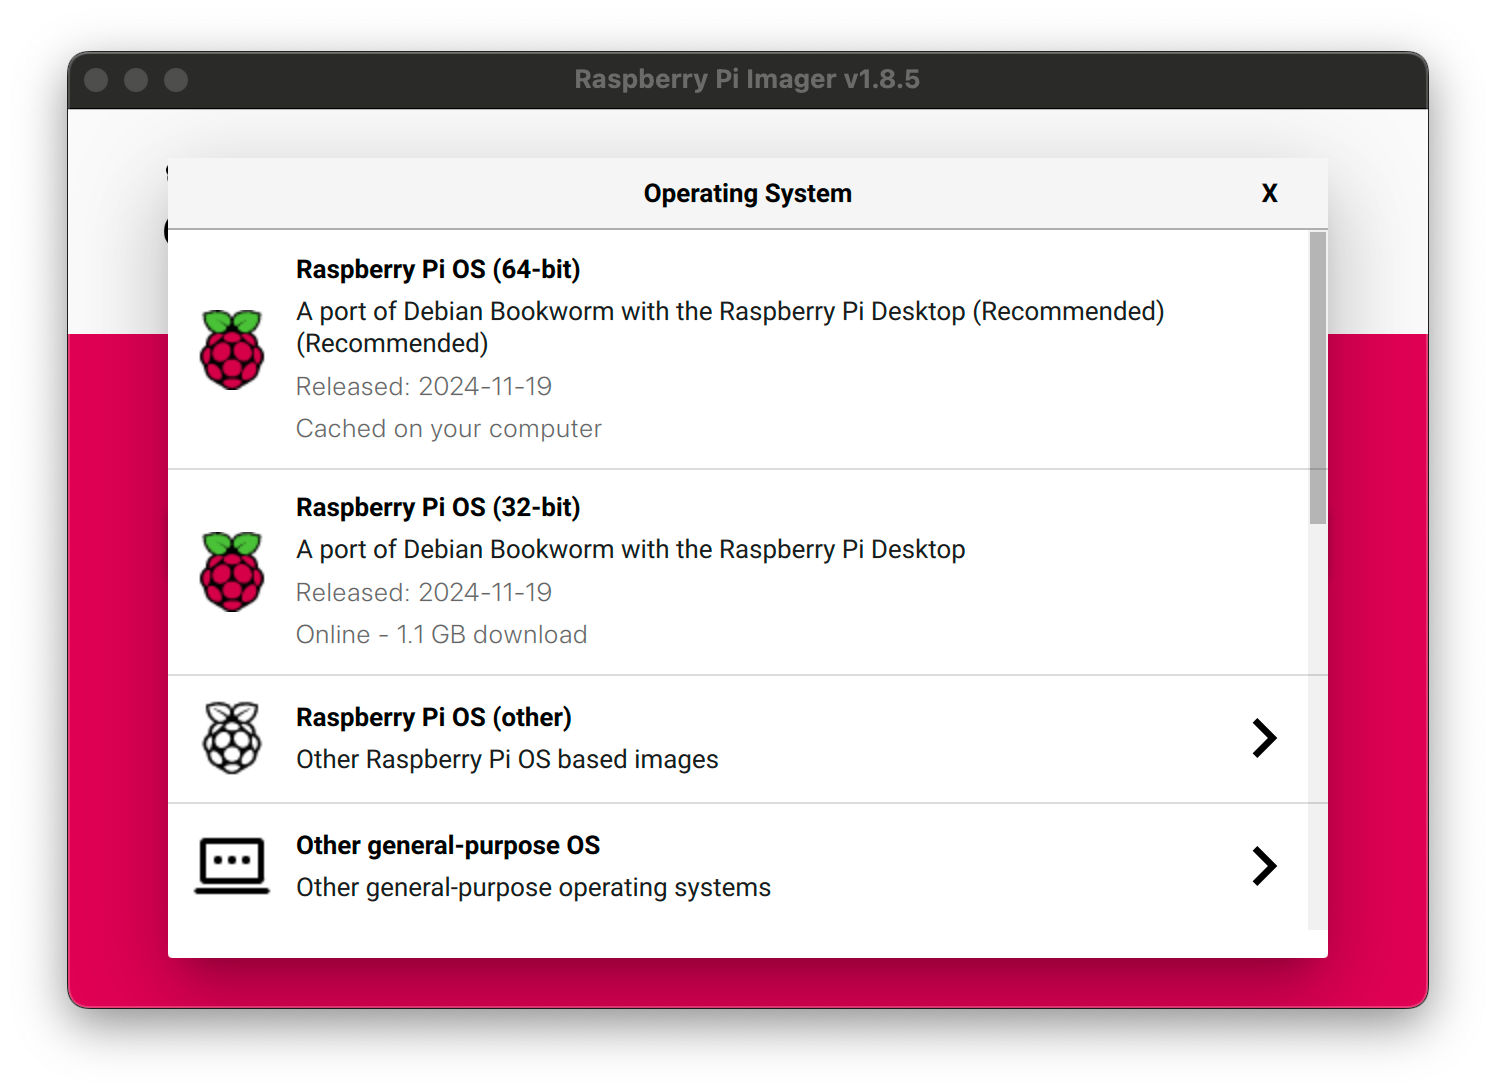
- Click on Choose OS and select Raspberry Pi OS (64-bit).
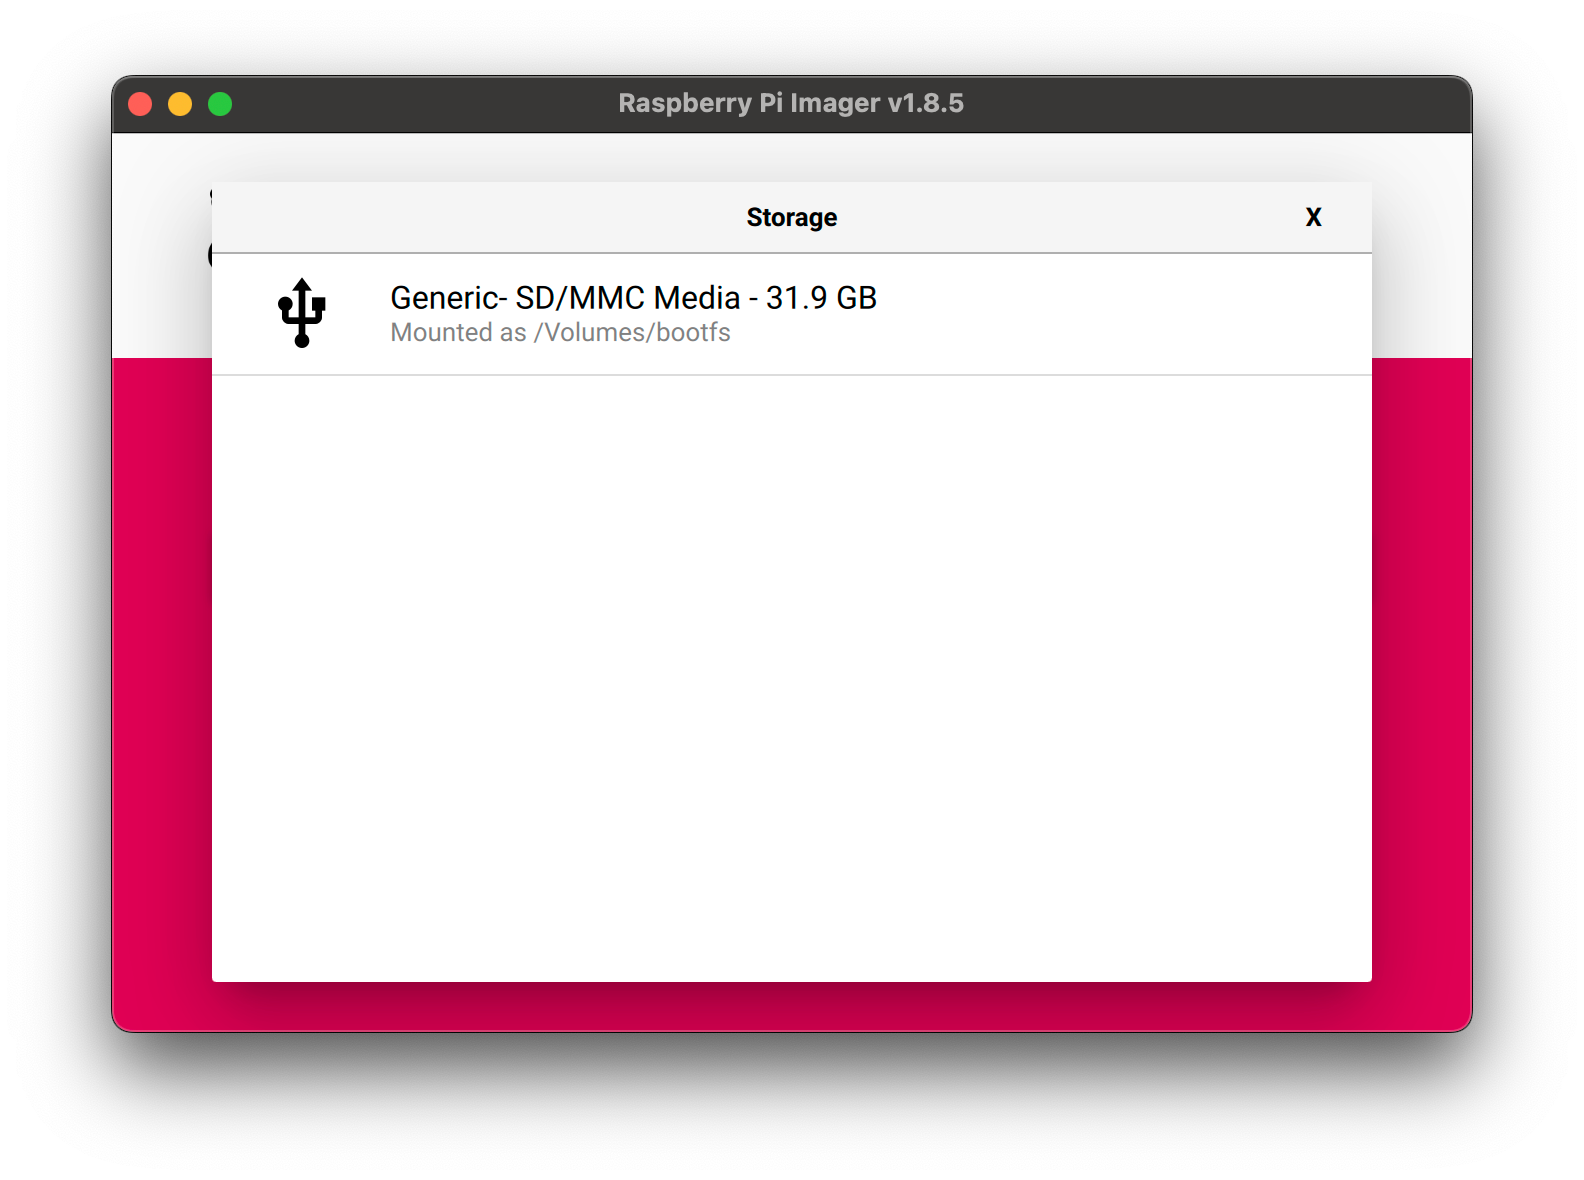
- Click on the Choose Storage button to flash the OS onto the SD card.
- Click on the Next button.
- A dialog box will ask you to confirm if you want to customize the settings. Select Edit Settings to customize the settings.
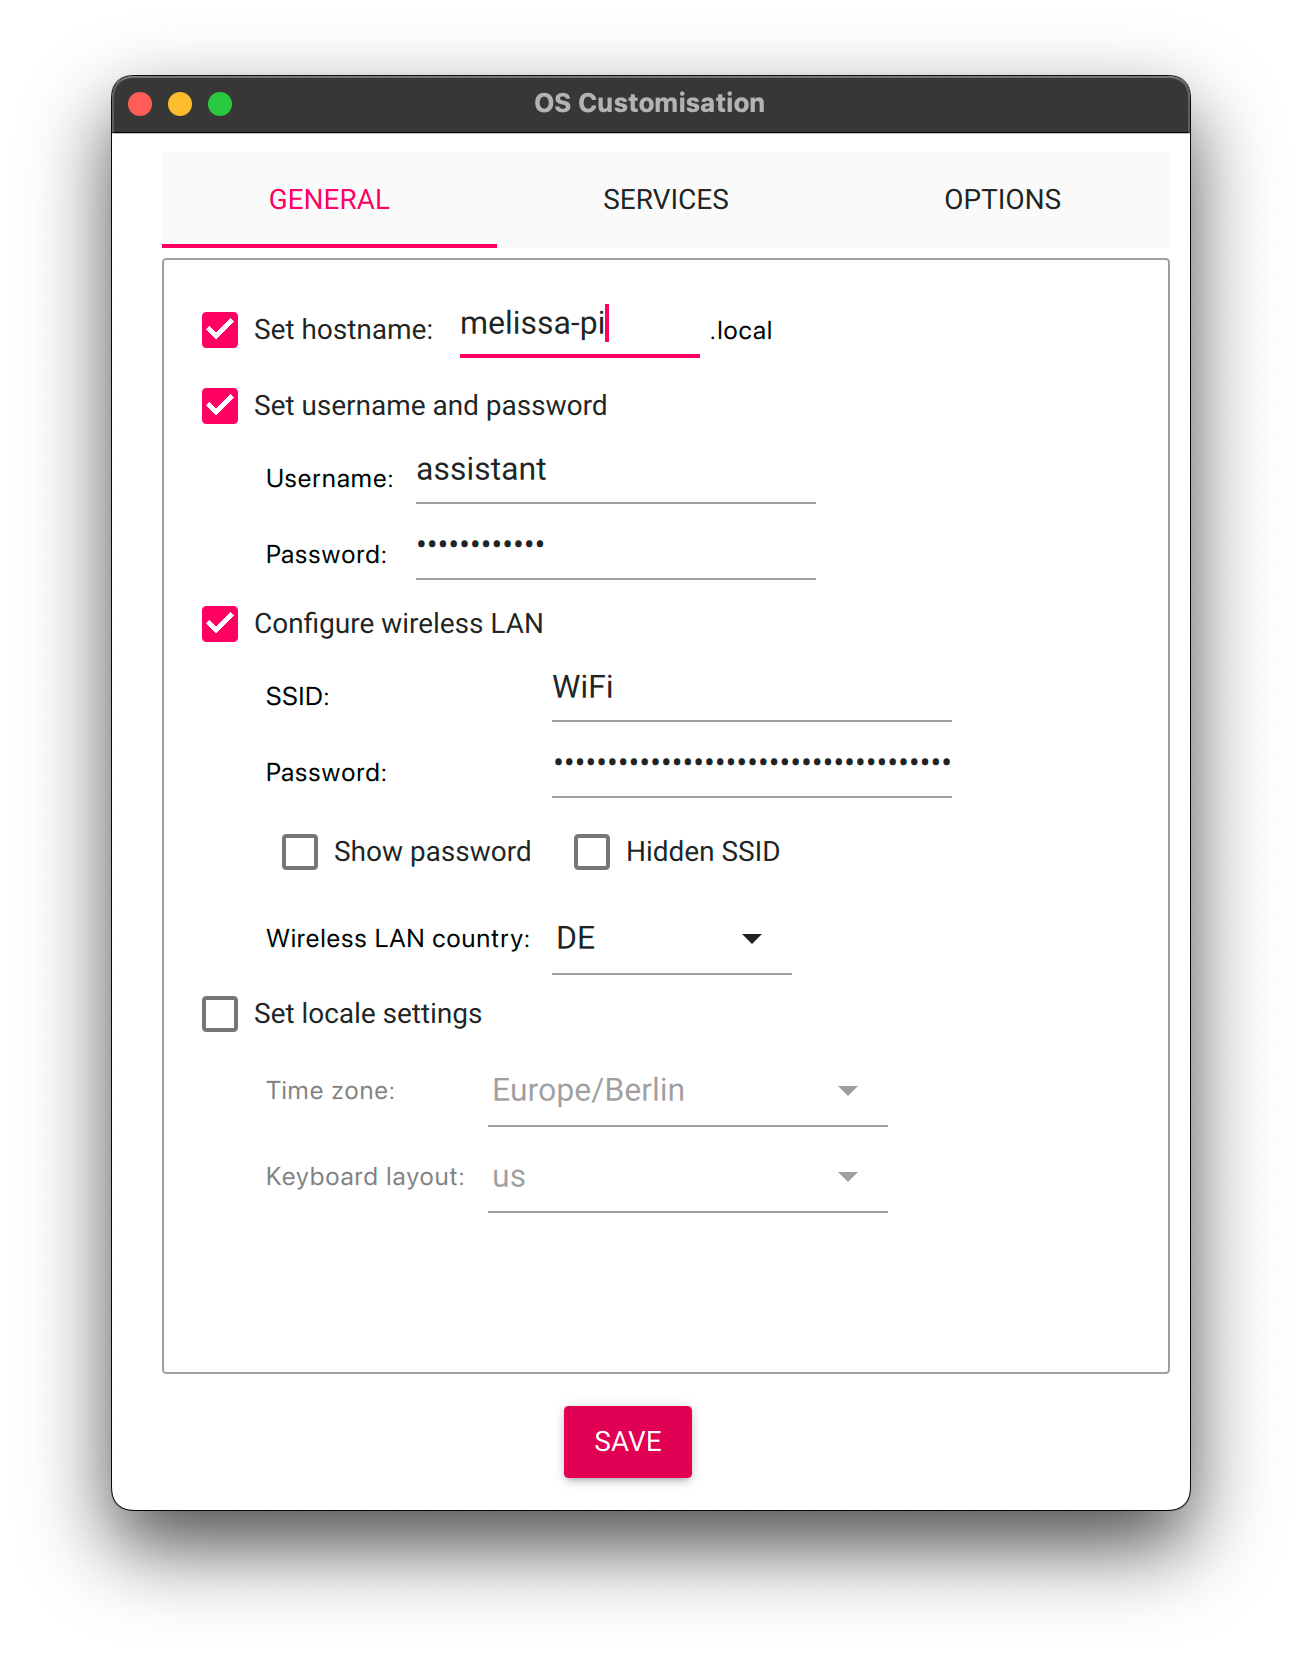
- In the OS Customisation dialog, configure the following:
- Set a hostname (e.g.,
n8n-pi). - Set a username and password for the default user. You will use this to log in to your Raspberry Pi.
- Select Configure wireless LAN and enter your Wi-Fi SSID and password if you are using a wireless connection.
- Set your locale settings (language, timezone, keyboard layout).
- In the Services tab, enable SSH to allow remote access to your Raspberry Pi.
- Configure the SSH key.
- Click on the Save button to save your customizations.
- Set a hostname (e.g.,
- Click on Yes to continue with the customization settings.
- Read the warning about data loss and click on Yes to start flashing the OS onto the SD card.
Booting Up Raspberry Pi
After the flashing process is complete, you are ready to boot up your Raspberry Pi. Insert the SD card into your Raspberry Pi and power it on. If you enabled SSH during the OS customization, you can access your Raspberry Pi remotely via SSH.
- Open a terminal on your computer.
- Use the following command to connect to your Raspberry Pi via SSH (replace
usernameandhostnamewith the values you set during OS customization):
ssh username@hostname- If prompted, accept the SSH key fingerprint by typing
yes. - If you setup a password, enter it when prompted.
Note: If you are not able to connect via SSH, ensure that your Raspberry Pi is connected to the same network as your computer and that SSH is enabled. Connect a monitor and keyboard to your Raspberry Pi to troubleshoot any network or SSH issues.
Setting Up Cloudflare Tunnel
Cloudflare Tunnels establish a secure, outbound-only connection between your private resources and Cloudflare’s global network, allowing you to expose local services to the internet without opening inbound firewall ports.
Configure Cloudflare Zero Trust
- Log in to your Cloudflare dashboard.
- Navigate to Zero Trust from the left-hand sidebar.
- If this is your first time using Zero Trust, you will need to go through a simple configuration process. Zero Trust is available for free, but you may need to provide billing information.
Create a New Tunnel
- Once on the Zero Trust dashboard, expand Networks in the left-hand sidebar.
- Click on Tunnels.
- Click the Add a tunnel button.
- Select Cloudflared as your tunnel type.
- Click Select Cloudflared.
- Enter a descriptive Tunnel name (e.g.,
n8n tunnel). - Click Save tunnel.
Install cloudflared on Raspberry Pi
Next, you need to install the cloudflared daemon on your Raspberry Pi. The Cloudflare dashboard will provide commands for different operating systems. For Raspberry Pi OS, select the Debian or Red Hat tab, then choose ARM64.
- Access your Raspberry Pi via SSH or open a terminal in the Raspberry Pi OS.
- Create a directory for keyrings:
sudo mkdir -p --mode=0755 /usr/share/keyrings- Add Cloudflare’s GPG keys to verify package authenticity:
curl -fsSL https://pkg.cloudflare.com/cloudflare-main.gpg | sudo tee /usr/share/keyrings/cloudflare-main.gpg >/dev/null- Add the Cloudflare repository to your system’s package list:
echo 'deb [signed-by=/usr/share/keyrings/cloudflare-main.gpg] https://pkg.cloudflare.com/cloudflared any main' | sudo tee /etc/apt/sources.list.d/cloudflared.list- Update your package list:
sudo apt update- Install
cloudflared:
sudo apt install cloudflared -yRun Cloudflared Service
After installing cloudflared, you can connect your Raspberry Pi to the Cloudflare Tunnel.
- Go back to your Cloudflare Tunnels dashboard.
- Copy the provided command for installing and running the connector. It will look similar to this (replace
<YOUR_TOKEN>with the actual token from your dashboard):
sudo cloudflared service install <YOUR_TOKEN>Important: The token in the command is sensitive. Do not share it with anyone. 3. Paste and run this command on your Raspberry Pi. 4. Once the command runs successfully, verify the Status in your Cloudflare dashboard for the tunnel. It should show as Connected.
Route Traffic for n8n
Now that the cloudflared connector is running, you need to define how external traffic should be routed to your n8n instance.
- In the Cloudflare dashboard, after your tunnel is connected, click Next to proceed to “Route Traffic”.
- Under Public Hostname, configure the following:
- Subdomain: Enter a desired subdomain (e.g.,
n8n). - Domain: Select your configured domain (e.g.,
harshil.dev). - Path: (Optional) Leave empty if you want n8n to be available at the root of the subdomain.
- Service Type: Select
HTTP. - URL: Enter
localhost:5678(This is the default port where n8n will run locally on your Raspberry Pi).
- Subdomain: Enter a desired subdomain (e.g.,
- Click Save tunnel.
Cloudflare will now create the necessary DNS record for your service. At this point, if you try to navigate to your subdomain (e.g., n8n.harshil.dev), you will likely encounter a “Bad Gateway” error because n8n is not yet running on your Raspberry Pi.
Deploying n8n with Docker Compose
This section covers setting up n8n on your Raspberry Pi using Docker and Docker Compose.
Install Docker and Docker Compose
To install Docker and Docker Compose on your Raspberry Pi, follow these steps:
- Update your package list:
sudo apt update- Install Docker:
curl -fsSL https://get.docker.com | sh- Add your user to the
dockergroup to run Docker commands withoutsudo:
sudo usermod -aG docker $USER- You may need to log out and log back in for the group change to take effect.
- While the above steps install Docker, and Docker Compose as a plugin, you can verify the installation by checking the versions:
docker --versiondocker compose version- If Docker Compose is not installed, you can install it manually:
sudo apt install docker-compose-pluginCreate n8n Configuration Files
You’ll create a directory for n8n and configure environment variables and a Docker Compose file.
- Access your Raspberry Pi via SSH or open a terminal in the Raspberry Pi OS.
- Create a directory for your n8n configuration:
mkdir n8ncd n8n- Create an
.envfile to store n8n environment variables:
nano .env- Add the following configurations to the
.envfile, replacingsubdomain.domain.tldwith your chosen subdomain:
N8N_HOST=subdomain.domain.tldN8N_PROTOCOL=httpsN8N_RUNNERS_ENABLED=trueN8N_PERSONALIZATION_ENABLED=falseGENERIC_TIMEZONE=Europe/BerlinN8N_HOST: The domain you configured in Cloudflare.N8N_PROTOCOL: Usehttpsfor secure connections via Cloudflare Tunnel.N8N_RUNNERS_ENABLED: Set totrueto enable n8n runners.N8N_PERSONALIZATION_ENABLED: Set tofalse(optional, can be omitted astrueis default).GENERIC_TIMEZONE: Set your desired timezone.
- Save and exit the
.envfile (Ctrl+X, Y, Enter for nano). - Create a
docker-compose.ymlfile:
nano docker-compose.yml- Add the following Docker Compose configuration. This defines the n8n service, its image, port mappings, environment variables (loaded from
.env), and a volume for persistent data.
services: n8n: image: docker.n8n.io/n8nio/n8n restart: always ports: - 5678:5678 environment: - N8N_HOST=${N8N_HOST} - N8N_PROTOCOL=${N8N_PROTOCOL} - N8N_RUNNERS_ENABLED=${N8N_RUNNERS_ENABLED} - N8N_PERSONALIZATION_ENABLED=${N8N_PERSONALIZATION_ENABLED} - WEBHOOK_URL=https://${N8N_HOST} - GENERIC_TIMEZONE=${GENERIC_TIMEZONE} - TZ=${GENERIC_TIMEZONE} volumes: - ./n8n_data:/home/node/.n8n- Save and exit the
docker-compose.ymlfile.
Start n8n Container
- Start the n8n container using Docker Compose:
docker compose up -dThis command will pull the n8n Docker image (which might take a few minutes depending on your internet speed) and start the container in detached mode.
- Check the logs to see if n8n started correctly:
docker compose logsYou might initially see errors like Error: Command "start" not found. This indicates a permissions issue that needs to be resolved.
Fix Permissions and Restart n8n
The n8n_data volume created by Docker Compose might have incorrect permissions, preventing the n8n container from writing its configuration.
- Stop the n8n container:
docker compose stop- Change the ownership of the
n8n_datadirectory to the user ID1000(which corresponds to thenodeuser inside the n8n Docker container):
sudo chown -R 1000:1000 n8n_data- Start the n8n container again:
docker compose start- Check the logs once more to confirm successful startup:
docker compose logsYou should now see messages indicating that migrations are running and eventually: Editor is now accessible via: https://subdomain.domain.tld.
Access n8n in Your Browser
- Open your web browser and navigate to the subdomain you configured (e.g.,
https://n8n.harshil.dev). - You should now see the n8n “Set up owner account” screen.
- Enter your desired Email, First Name, Last Name, and Password.
- Click Next.
- You will be redirected to the n8n dashboard, ready to create your first workflow.
Conclusion
You have successfully installed n8n on your Raspberry Pi and made it accessible over the internet using Cloudflare Tunnels. This setup provides a secure and free way to host your own automation workflows. You can now leverage n8n’s extensive capabilities to automate tasks, integrate various services, and prototype new automations, all while benefiting from the performance and security features of Cloudflare.