Every year, Spotify offers Spotify Wrapped to its users. If you’re a Spotify user, you might have come across it. Spotify Wrap shares some cool analytics like top artists, top albums, top 10 songs, the number of minutes you listened to, and more.
I have never tried it, but I saw the engagement it created among the users. Everyone enjoyed it. I thought - why not do something similar for our open-source contributions. It would be fun to share some stats on our open-source contributions.
I came across a couple of similar projects, but I still wanted to create one for myself. I wanted to challenge myself to use no-code/low-code tools to create GitHub Wrap. In this blog, I share how I created GitHub Wrap.
Researching the tools
Working at n8n, I was already familiar with the platform and knew that it would be the best automation tool to handle the business logic - fetch data from GitHub, create and return the image.
Participating in No-code November, I wanted to create this project with only no-code/low-code platforms. I looked into website builders like Typedream, Webflow, or Bubble. They are good at what they do, but I couldn’t find what I was looking for. I was already running late for my submission, and I didn’t have much time to dive deeper into them.
HTML to the rescue
Jan Oberhauser, the founder and CEO of n8n, once showed us how to serve HTML pages via n8n. That was a mind-blowing moment. That’s when I realised that n8n is more than just an automation platform.
Implementing this learning, I coded the pages in native HTML using Tailwind to style them.
Can I have a pretty URL?
Using the combination of the Webhook node and the Set node, my webhook was now serving the HTML page with the GitHub stats. However, the URL was long, and I didn’t want to expose it directly to the world.
I knew what I wanted to do, but I wasn’t sure about the implementation. Enters Cloudflare. Let me tell you, Cloudflare is amazing! It provides so many services - hosting websites, configuring DNS, handling caching, and a lot more.
Using Cloudflare workers, I was able to render the HTML pages served by n8n to a pretty URL - lowcode.land/ghwrap/.
If you’re interested in learning more about Cloudflare Workers, I suggest referring to their documentation. They have good examples that can help you get started.
What about the image?
I am not a designer, and I created at least five designs before finalising the one you now see. With the new and improved design, I wanted to do more. Using the Edit Image node of n8n, I could only use the system fonts. I could extend and add more fonts, but the other challenge was serving the image over Content Delivery Network (CDN). I am sure there’s a way to handle it, but again, I was on a tight deadline to finish the project.
I’ve played around with Cloudinary before, and I knew it was the perfect platform for this use case. I uploaded the template image to Cloudinary and played with the transformation API to display the data at the correct position.
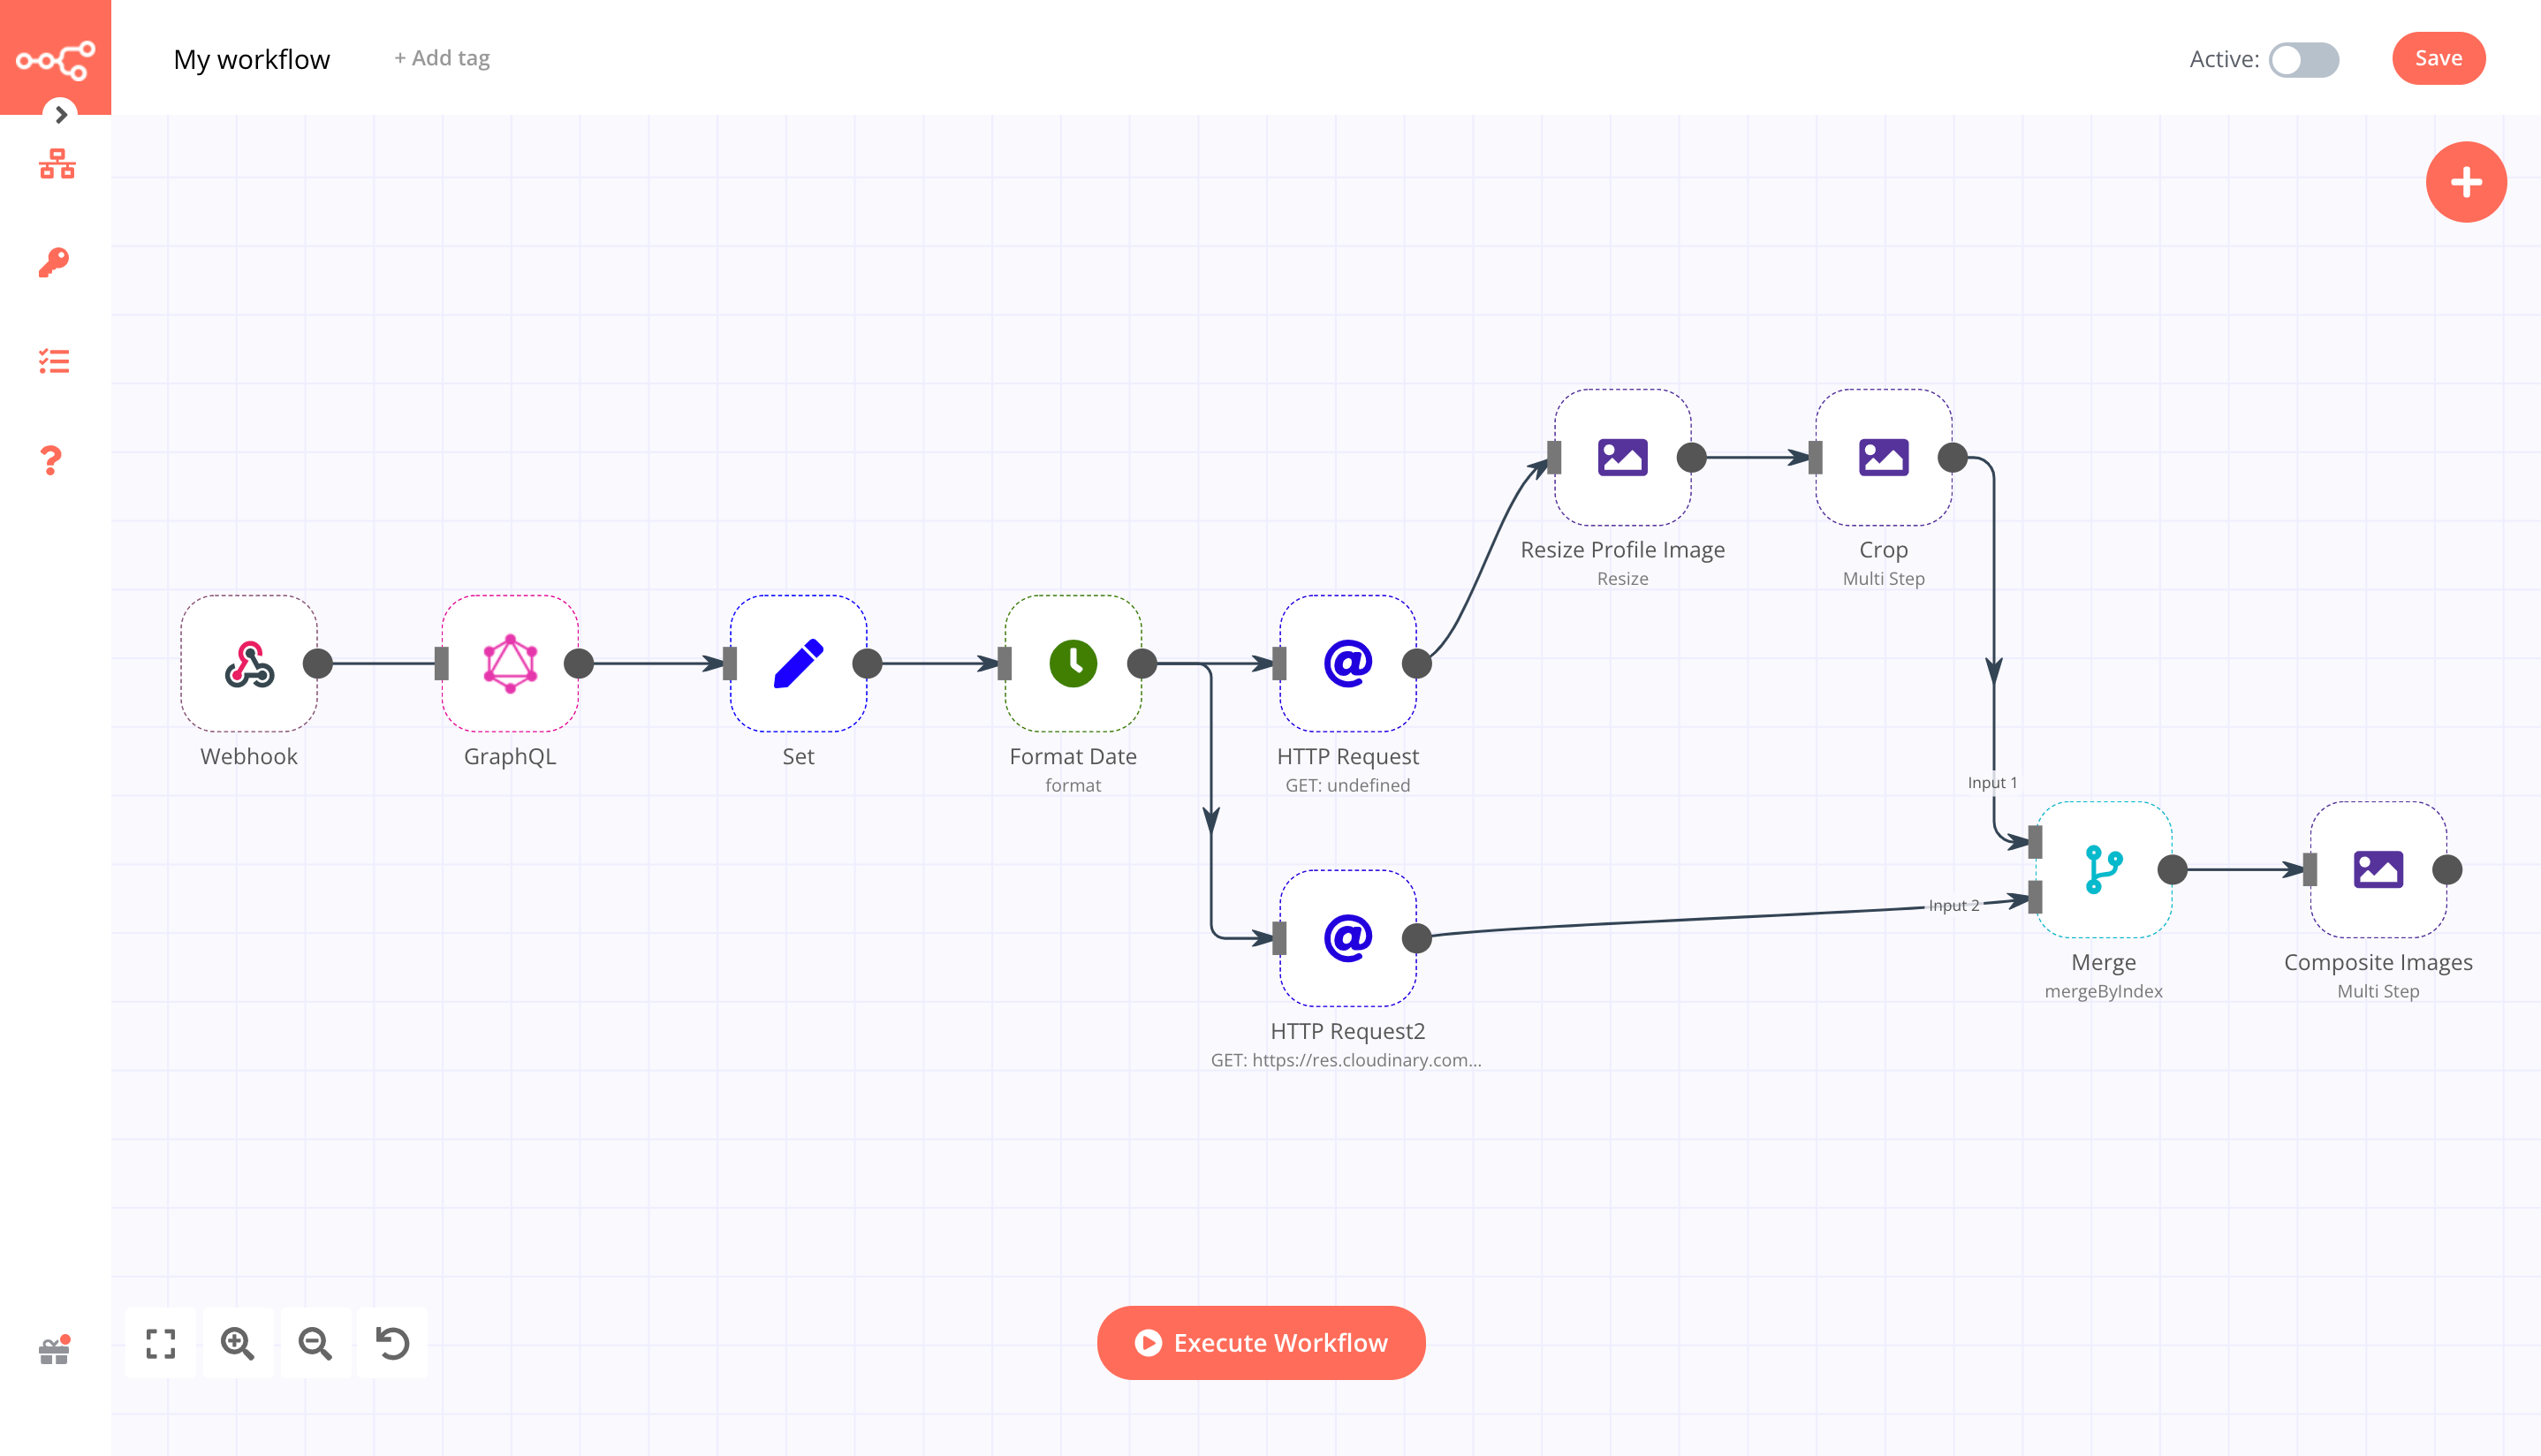
The following was the process to create the image:
- Get the username from the Webhook node
- Using the GraphQL node, fetch the information from GitHub’s GraphQL API
- Pass the data to the HTTP Request node and call the transformation URL
The next step was challenging. To composite the user avatar on the template, there were two possible options:
- Upload the image to Cloudinary and reference it in the transformation API
- Encode the URL and pass it with the transformation API
The first approach seemed more complicated. I didn’t want to store anyone’s avatar in Cloudinary. That didn’t make sense. I started exploring the second approach. Unfortunately, that didn’t work either. Cloudinary always returned the error: Resource not found (or something similar).
To handle this issue, I took the n8n approach. I used the Edit Image node to crop the image in a circle and composite it on the template image. Below is the screenshot of the final workflow.
But how to render the image on the HTML page?
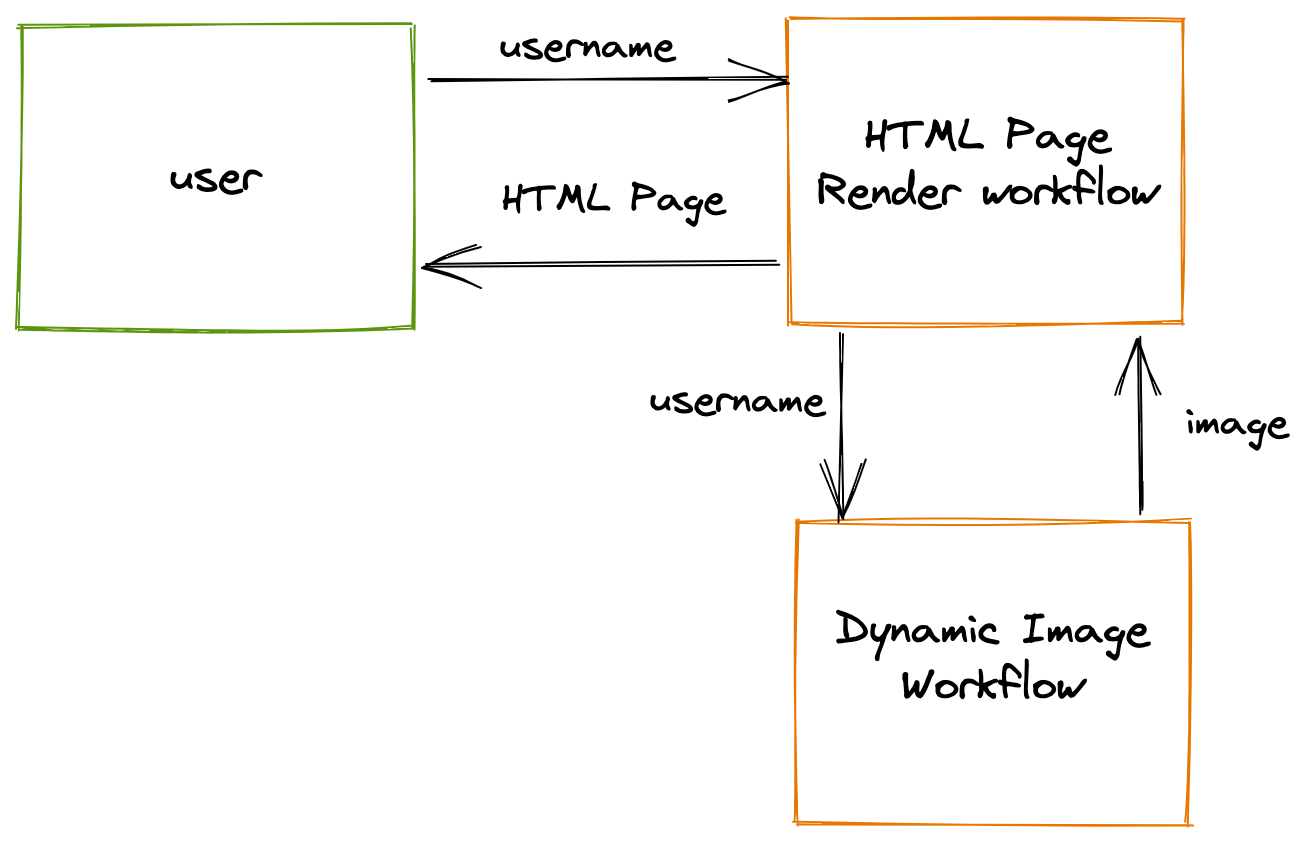
I now had a workflow that created a dynamic image and returned it as a response to the webhook call. I designed another workflow that rendered the HTML page. The meta tags and the image tag referenced the URL of the previous workflow to fetch the image.
The below image illustrates the process.
Summary
GitHub Wrap was a weekend project created using n8n, Cloudflare, and Cloudinary. I never imagined it would receive such a massive response from the community. I am truly grateful for all the love and feedback received from the community.
While creating the project, I learned a lot, and I plan to share that soon in the upcoming blog posts. At the time of writing this article, more than 30K people have at least visited the website. On Product Hunt there are 169 upvotes, 56 comments, and four reviews. My Twitter is blowing with notifications every minute, and I ran into error 429 (rate-limit) when I tried to find the number of tweets with the hashtag #GitHubWrap.
What’s next?
I received some great feedback from the community, and I plan to implement them in v2. This project has showcased the true potential of n8n to me. I am not sure if v2 will get built with code or I will continue the low-code approach. I am open to hearing your thoughts. If you’re interested in collaborating for v2, feel free to hit me up on Twitter.
I have not spent any extra money to run this project. I am running n8n on the basic server (CX11) offered by Hetzner (referral link), using the free tier of Cloudflare, and consuming the credits I collected for Cloudinary. I am afraid I will have to shut it down if I run out of the benefits provided by the free tier. If you want me to continue the project, consider sponsoring me on GitHub or sign-up on Cloudinary using my referral link.
I am working on a new project that you may find interesting. Stay tuned for the launch!