In the previous article, I set up OpenClaw on a Raspberry Pi as an always-on personal AI assistant. It works great on my local network, but what if I want to chat with my assistant while I’m away from home? Or use it from my phone while commuting?
The obvious answer is to expose it to the internet. But opening ports on my home router and exposing a service directly? That’s a recipe for security headaches. Instead, I wanted a solution that keeps my Pi hidden behind my firewall while still making OpenClaw accessible from anywhere.
Enter Cloudflare Tunnels and Workers VPC. This combination creates a secure, authenticated gateway to OpenClaw without exposing any ports on my home network. In this tutorial, I’ll walk you through the setup.
What You’ll Build
By the end of this tutorial, you’ll have:
- A Cloudflare Tunnel creating a secure outbound connection from your Pi to Cloudflare’s network
- A VPC Service that allows Workers to access your private OpenClaw instance
- Cloudflare Access protecting your gateway with authentication
- A Worker that proxies requests to OpenClaw, including WebSocket connections for real-time chat
- An OpenAI-compatible API endpoint for programmatic access
Here’s the architecture (hover over each component to learn more):
Prerequisites
Before you begin, ensure you have the following:
- OpenClaw running on your Raspberry Pi (see Part 1: Run OpenClaw on Raspberry Pi)
- A Cloudflare account
- Node.js 18+ installed on your development machine
Note: Workers VPC is currently in beta and available for free on all Workers plans.
Step 1 - Setting Up Cloudflare Tunnel
Cloudflare Tunnel creates a secure, outbound-only connection from your Raspberry Pi to Cloudflare’s network. This means your Pi initiates the connection, so you don’t need to open any ports on your router.
If you’ve already set up a tunnel following my n8n on Raspberry Pi tutorial, you can reuse that tunnel. Otherwise, let’s create one.
Create a Tunnel
- Navigate to the Workers VPC dashboard and make sure you are on the Tunnels tab.
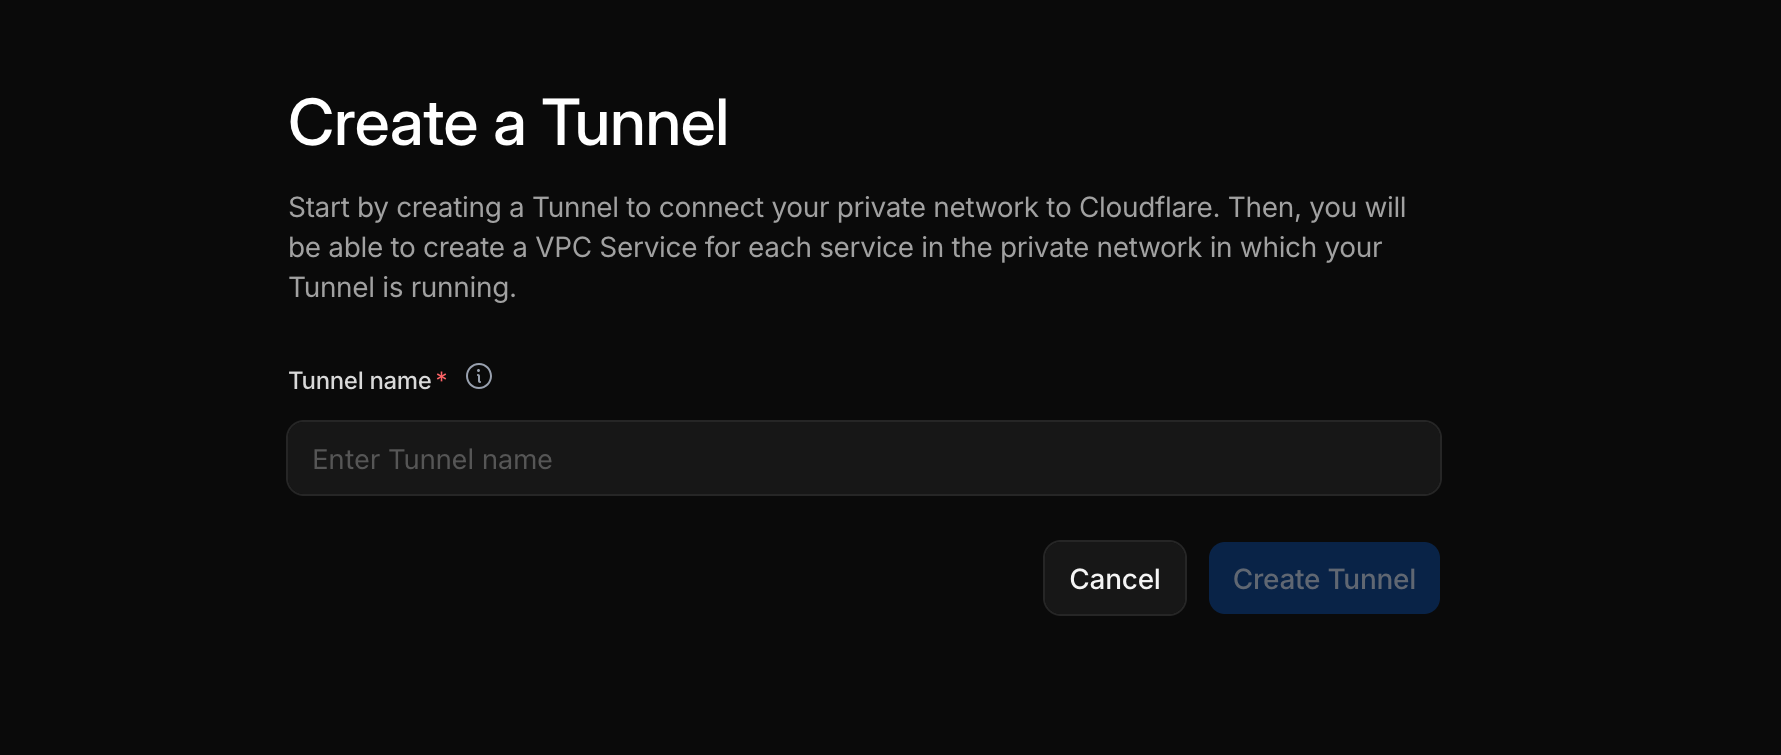
- Click Create Tunnel to create a new tunnel.
- Enter a name for your tunnel (e.g.,
openclaw-tunnel) and click Create Tunnel. - The dashboard will show installation instructions for your operating system. Since we’re installing on Raspberry Pi, select Debian and arm64-bit.
- Follow the instructions shown on the dashboard to install
cloudflaredon your Pi and connect the tunnel. - Once installed, the status in the Connection Status should show Connected.
Important: The token shown in the command is sensitive. Don’t share it publicly.
Step 2 - Creating a VPC Service
Now that the tunnel is connected, we need to create a VPC Service. This tells Cloudflare Workers how to reach your OpenClaw instance through the tunnel.
Using the Dashboard
- Navigate to the VPC Services tab.
- Click Create VPC Service to create a new VPC Service.
- Configure the service:
- Service name:
openclaw-service - Tunnel: Select the tunnel you created in Step 1
- Host or IP address:
localhost - Ports: Select Provide port values and enter
18789for the HTTP port
- Service name:
- Click Create service.
The dashboard will display your new VPC Service with a unique Service ID. Copy this ID—you’ll need it when configuring the Worker.
Alternative: Using the CLI
If you prefer the command line, you can create the VPC Service with Wrangler:
npx wrangler vpc service create openclaw-service \ --type http \ --tunnel-id <YOUR_TUNNEL_ID> \ --hostname localhost \ --http-port 18789Replace <YOUR_TUNNEL_ID> with your tunnel ID from Step 1. The command will output a Service ID.
Step 3 - Creating your Worker
The Worker acts as a gateway between the internet and your private OpenClaw instance. It proxies HTTP requests, and bridges WebSocket connections for real-time chat. To keep things secure, it also integrates with Cloudflare Access for authentication.
I’ve created a ready-to-use Worker for this purpose. Let’s set it up.
Clone and Configure
- Clone the repository:
git clone https://github.com/harshil1712/workers-openclaw-vpccd workers-openclaw-vpcnpm install- Open
wrangler.jsoncand update the configuration:
{ "$schema": "node_modules/wrangler/config-schema.json", "name": "workers-openclaw-vpc", "main": "src/index.ts", "compatibility_date": "2026-01-28", "vars": { "TEAM_DOMAIN": "https://YOUR_TEAM.cloudflareaccess.com" }, "vpc_services": [ { "binding": "VPC_SERVICE", "service_id": "<YOUR_VPC_SERVICE_ID>", "remote": true } ]}Replace:
YOUR_TEAMwith your Cloudflare Access team name (found in Zero Trust dashboard URL)<YOUR_VPC_SERVICE_ID>with the Service ID from Step 2
Understanding the Code
The Worker uses Hono as a lightweight web framework. Here’s what each part does:
Authentication Middleware (src/middleware/auth.ts): Validates the JWT token from Cloudflare Access on every request. If the token is invalid or missing, the request is rejected.
Chat Completions API (/v1/chat/completions): Proxies requests to OpenClaw’s OpenAI-compatible API endpoint. This allows you to use OpenClaw programmatically from any application.
WebSocket Proxy (/): Bridges WebSocket connections between your browser and OpenClaw for real-time chat in the Control UI.
SPA Routes (/app/*): Serves the OpenClaw dashboard with proper client-side routing support.
Testing Locally
If you want to test the Worker locally before deploying, you will need to disable the authentication middleware temporarily. Open src/index.ts and comment out the authentication middleware line:
// app.use(authMiddleware);Note: Do not forget to re-enable authentication before deploying!
Next, rename the .dev.vars.example file to .dev.vars and set OPENCLAW_GATEWAY_TOKEN to your Gateway token. You will need this token to access OpenClaw. You also need to set POLICY_AUD to your Cloudflare Access Application Audience (AUD) Tag. But for local testing, you can leave it empty.
To get your OpenClaw Gateway token, SSH into your Pi and run:
ssh username@openclaw-pi.localcat ~/.openclaw/openclaw.json | grep tokenNow, start the Worker locally:
npm run devNavigate to the local URL provided by Wrangler (usually http://localhost:8787/app) to test the Worker. You will see the OpenClaw dashboard if everything is set up correctly. To try it out, enter your Gateway token.
You can now access OpenClaw through the Worker locally!
Deploy
To deploy the Worker to Cloudflare’s edge network, you need to re-enable the authentication middleware in src/index.ts if you had disabled it for local testing. You also need to configure the secrets for POLICY_AUD and OPENCLAW_GATEWAY_TOKEN (covered in the next section).
After enabling authentication, deploy the Worker:
npm run deployThe command will output your Worker URL (e.g., https://workers-openclaw-vpc.your-account.workers.dev).
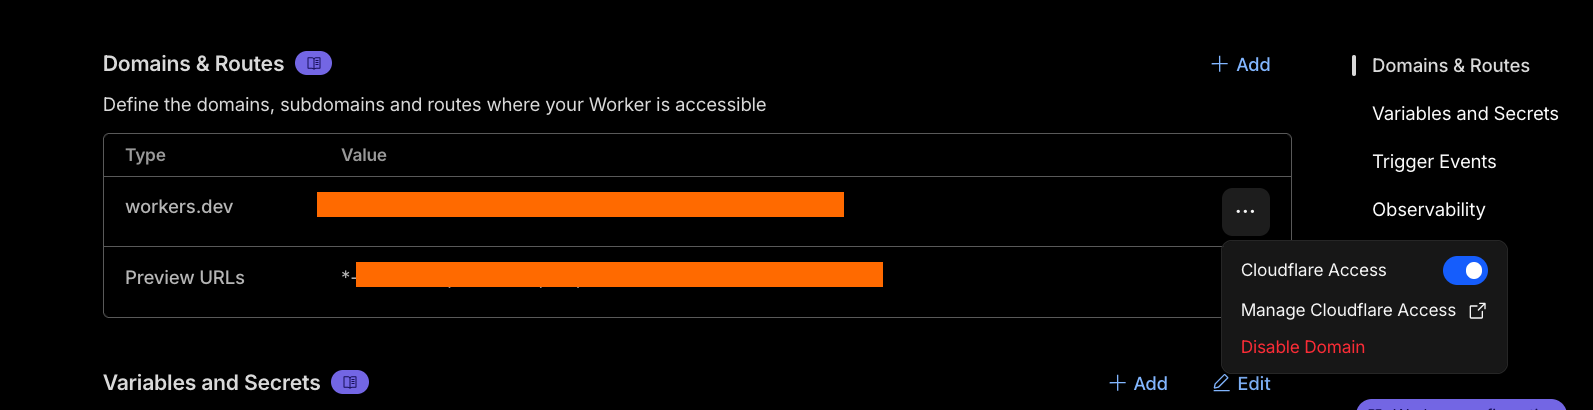
Next, navigate to the Cloudflare Dashboard, find your Worker, and go to the Settings tab. Under the Domains & Routes section, click on the menu next to your Worker URL, and enable Cloudflare Access. It will show you the Audience (AUD) Tag—copy this value for the next step.
Set Secrets
The Worker needs two secrets that shouldn’t be in your configuration file:
npx wrangler secret put POLICY_AUDWhen prompted, paste the Application Audience (AUD) Tag from Step 3.
npx wrangler secret put OPENCLAW_GATEWAY_TOKENWhen prompted, paste your OpenClaw Gateway token. You can find this in your Pi’s OpenClaw configuration:
ssh username@openclaw-pi.localcat ~/.openclaw/openclaw.json | grep tokenConfigure Custom Domain (Optional)
If you want your Worker available at a subdomain you can configure a custom domain:
- Go to Workers & Pages in the Cloudflare dashboard.
- Select your Worker.
- Go to Settings → Triggers.
- Under Custom Domains, add
openclaw.yourdomain.com.
Step 5 - Testing Your Setup
Let’s verify everything works:
- Open your browser and navigate to your Worker URL (or custom domain).
- Cloudflare Access will redirect you to authenticate. Complete the authentication flow. (You can setup Access policies with different methods like Google login, GitHub, etc.)
- After authentication, you should be redirected to
/app—the OpenClaw dashboard. - Enter your Gateway token if prompted and start a conversation.
If you see the OpenClaw Control UI and can chat with your assistant, congratulations! Your setup is complete.
Quick Testing with the Demo Chat
The Worker includes a simple demo chat interface at /chat.html for quick API testing. Navigate to https://your-worker-url/chat.html to try it out. Note that it uses a hardcoded model name (MiniMax-M2.1), so you may need to modify it if you’re using a different model.
Using the API Programmatically
One of the advantages of this setup is the OpenAI-compatible API endpoint at /v1/chat/completions. This allows you to integrate OpenClaw with other applications, scripts, or tools.
Enable API Access
First, make sure API access is enabled in your OpenClaw Gateway. Check your configuration on the Pi:
cat ~/.openclaw/openclaw.jsonIt should include:
{ "http": { "endpoints": { "chatCompletions": { "enabled": true } } }}Ensure the API is enabled for your Gateway.
Create a Service Token
For programmatic access (without browser authentication), you need a Cloudflare Access service token:
- Go to the Zero Trust dashboard.
- Navigate to Access controls → Service credentials → Service Tokens.
- Click Create Service Token.
- Enter a name (e.g.,
OpenClaw API) and select a duration. - Click Generate token.
- Important: Copy the Client ID and Client Secret immediately. The Client Secret is only shown once.
Add Service Token to Access Policy
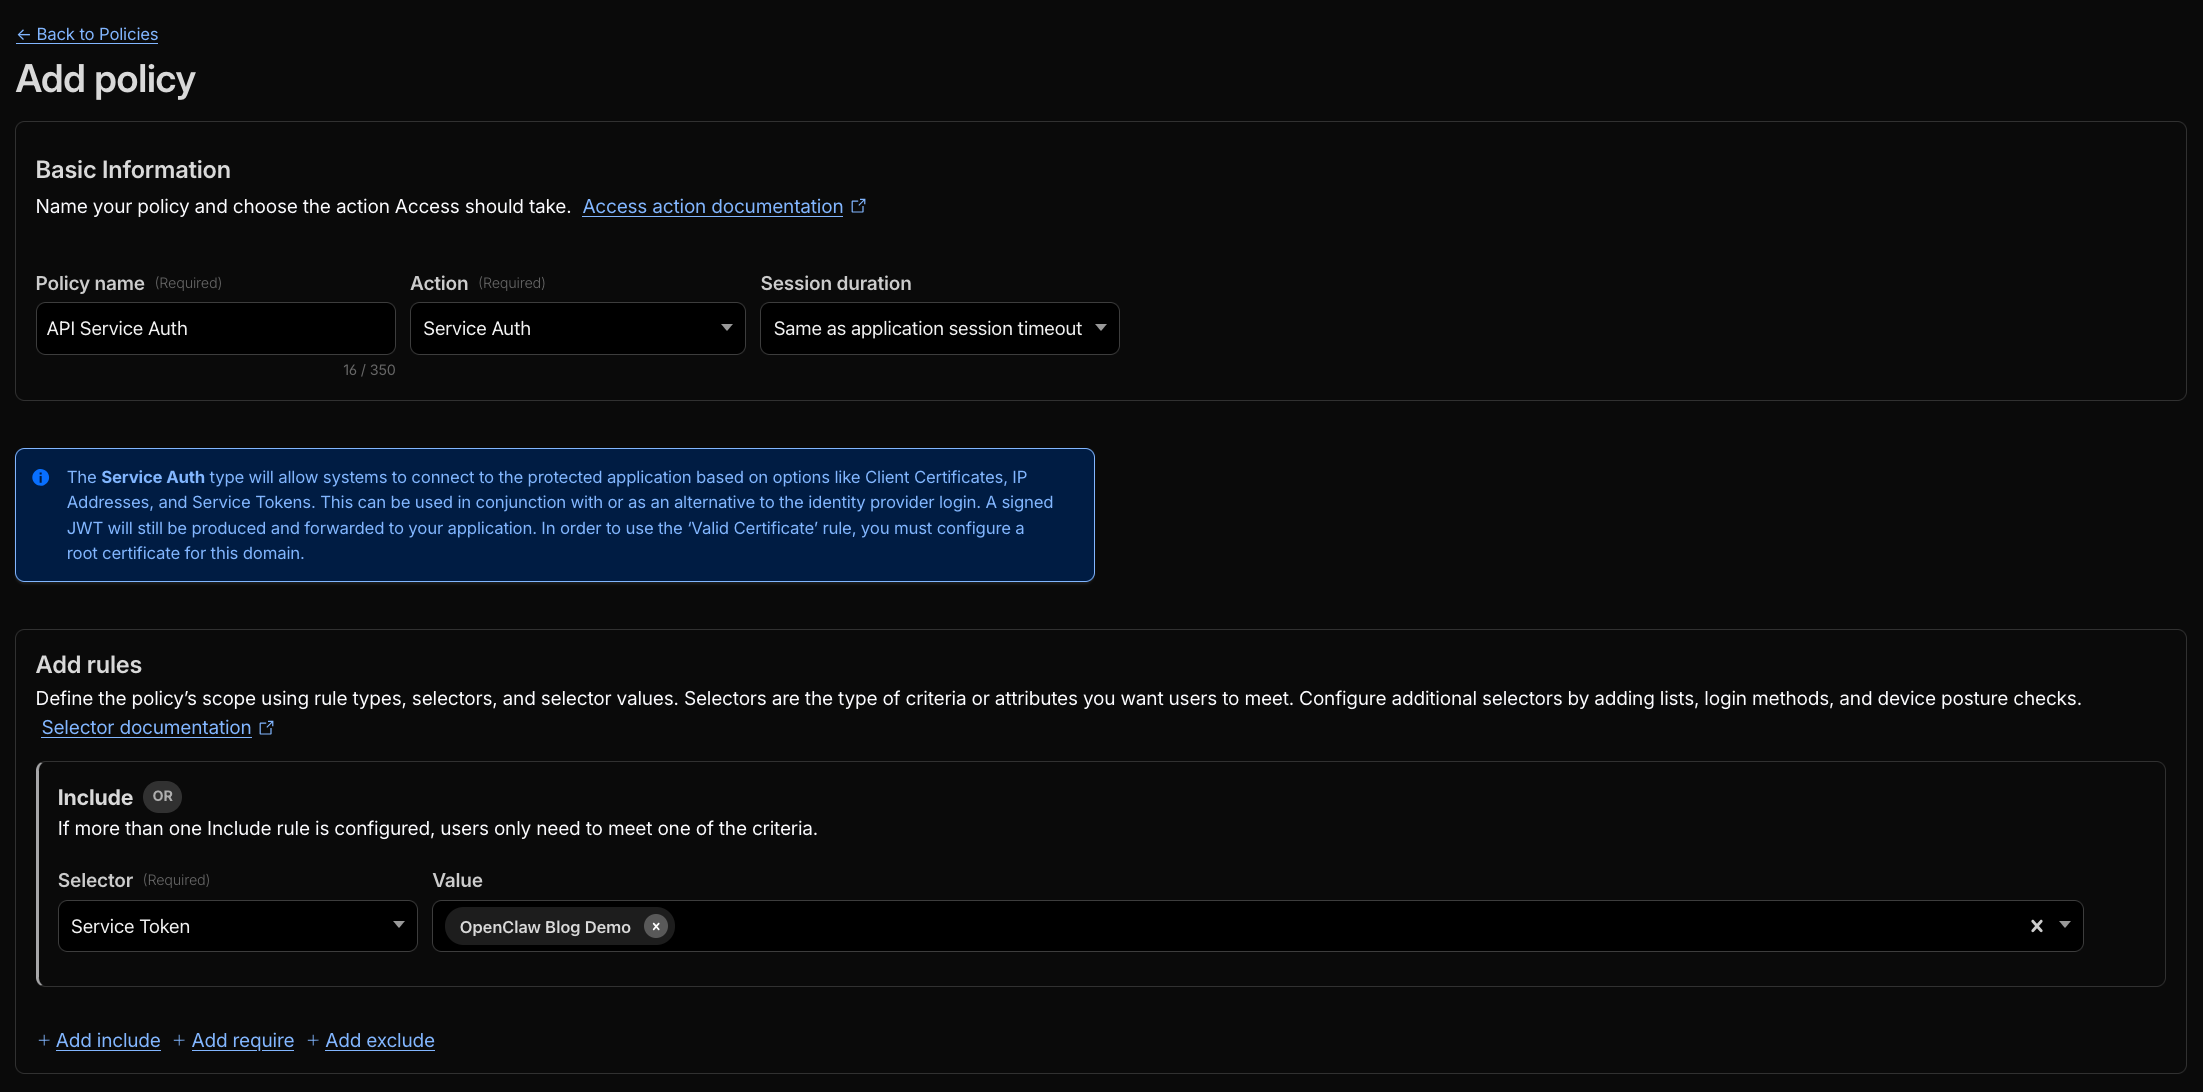
Return to your Access application and add a policy that accepts the service token:
- Go to Access controls → Applications → Your OpenClaw application.
- Add a new policy with Action set to Service Auth.
- Add a rule with Selector set to Service Token and select your token.
Make API Requests
Now you can make authenticated API requests:
curl -X POST https://openclaw.yourdomain.com/v1/chat/completions \ -H "Content-Type: application/json" \ -H "CF-Access-Client-Id: <CLIENT_ID>" \ -H "CF-Access-Client-Secret: <CLIENT_SECRET>" \ -d '{ "model": "MiniMax-M2.1", "messages": [ {"role": "user", "content": "What can you help me with today?"} ] }'Replace <CLIENT_ID> and <CLIENT_SECRET> with your service token credentials, and adjust the model name to match your configured provider.
The API also supports streaming responses—just add "stream": true to your request body.
Conclusion
You’ve successfully exposed your self-hosted OpenClaw AI assistant to the internet while keeping it secure behind Cloudflare’s authentication layer. Your Raspberry Pi remains safely behind your firewall with no open ports, yet you can access your personal AI assistant from anywhere in the world.
Here’s what we accomplished:
- Created a Cloudflare Tunnel for secure, outbound-only connectivity
- Set up a VPC Service to route Worker requests to your private network
- Configured Cloudflare Access for authentication
- Deployed a Worker gateway that proxies requests and WebSocket connections
- Enabled programmatic API access with service tokens
The best part? This entire setup runs on Cloudflare’s free tier (Workers VPC is free during beta), so you get enterprise-grade security for your personal AI assistant without any additional cost.
Some ideas for what’s next:
- Build a mobile app using the API endpoint
- Create automations that interact with your assistant
- Add more Access policies for family members
- Connect OpenClaw to messaging channels like Telegram or WhatsApp
If you run into any issues or have questions, feel free to reach out on LinkedIn or X (Twitter).