Home Automation has always fascinated me. The thought of lights turning on automatically when you walk into the room, and the ability to change the brightness and color of the lights based on the mood, are just some of the home automation ideas I love.
There are various ways you can start with home automation. Open-source projects like Home Assistant, Homebridge, openHAB, etc. enable you to get started with home automation without vendor locking. This means that you can use smart bulbs from any manufacturer, use one of the projects mentioned above, and connect them to your network and phone. This approach is cheaper, but you need to manually set it up.
If you are into the Apple ecosystem, like me, you might be familiar with HomeKit. HomeKit is Apple’s solution for home automation. You can connect your smart devices to HomeKit and ask Siri to turn on/off your lights!
However, not every manufacturer has support for HomeKit. You either have to buy expensive devices and connect them to HomeKit, or buy less expensive ones and use the app provided by the manufacturer. In my opinion, the latter isn’t a feasible solution. For one, the app might not have support for iOS Shortcut and Siri. The other drawback is using different apps for different devices.
In this article, I’ll walk you through my home automation setup and help you get started with your home automation journey.
NOTE: The smart bulbs at my home use services by Tuya under the hood. Hence, this tutorial focuses on devices that run on Tuya.
Prerequisites
-
Raspberry Pi installed with Homebridge - Install Homebridge on your Raspberry Pi following the instructions mentioned here. I am using RPi 2, and it is working amazingly well. The only drawback I have incurred is its lack of a WiFi module. For internet access, the RPi is connected to the router via LAN.
-
Smart Bulb - I was lucky to find cheap smart bulbs by Energizer. If you live in Germany, you may find them at Woolworth.
-
Tuya Developer Account - Sign up for a developer account on the Tuya IoT Development Platform.
Connect the smart bulb to the Tuya App
All Tuya-enabled smart devices get connected to Tuya via the Tuya Smart App. The app allows you to control your devices from your phone. However, you can’t directly connect it to HomeKit.
Download the Tuya app, and sign in with your Tuya account. If your phone is connected to 5 GHz, you should connect it to the 2.4GHz signal. For setting up the bulb, you also need to turn on the Bluetooth.
When you turn on the bulb, it will flash for some time, which indicates that the bulb is ready to connect. When your bulb flashes, open up the Tuya app. You may get a prompt in the app asking you to add the newly discovered device. If you don’t get the prompt, click on the plus icon on the top right and select Add Device.
The app will search for a nearby device and show you the available devices. Click on the plus icon next to your smart bulb and let the app connect the bulb to the network. You can also rename the bulb for easy identification.
If the setup is a success, you should be able to control the bulb via the app. Keep in mind if you check the HomeKit app on your phone, the bulb won’t be available. You can’t also ask Siri to turn on/off the light. In the next section, you will learn how to connect the bulb to the Tuya Developer Platform.
Connect the smart bulb to the Tuya IoT Development Platform
You connected the smart bulb to the Tuya app, however, you still can’t access it via Apple HomeKit. To make the bulb accessible via HomeKit, you need to connect it to the Tuya IoT Development Platform.
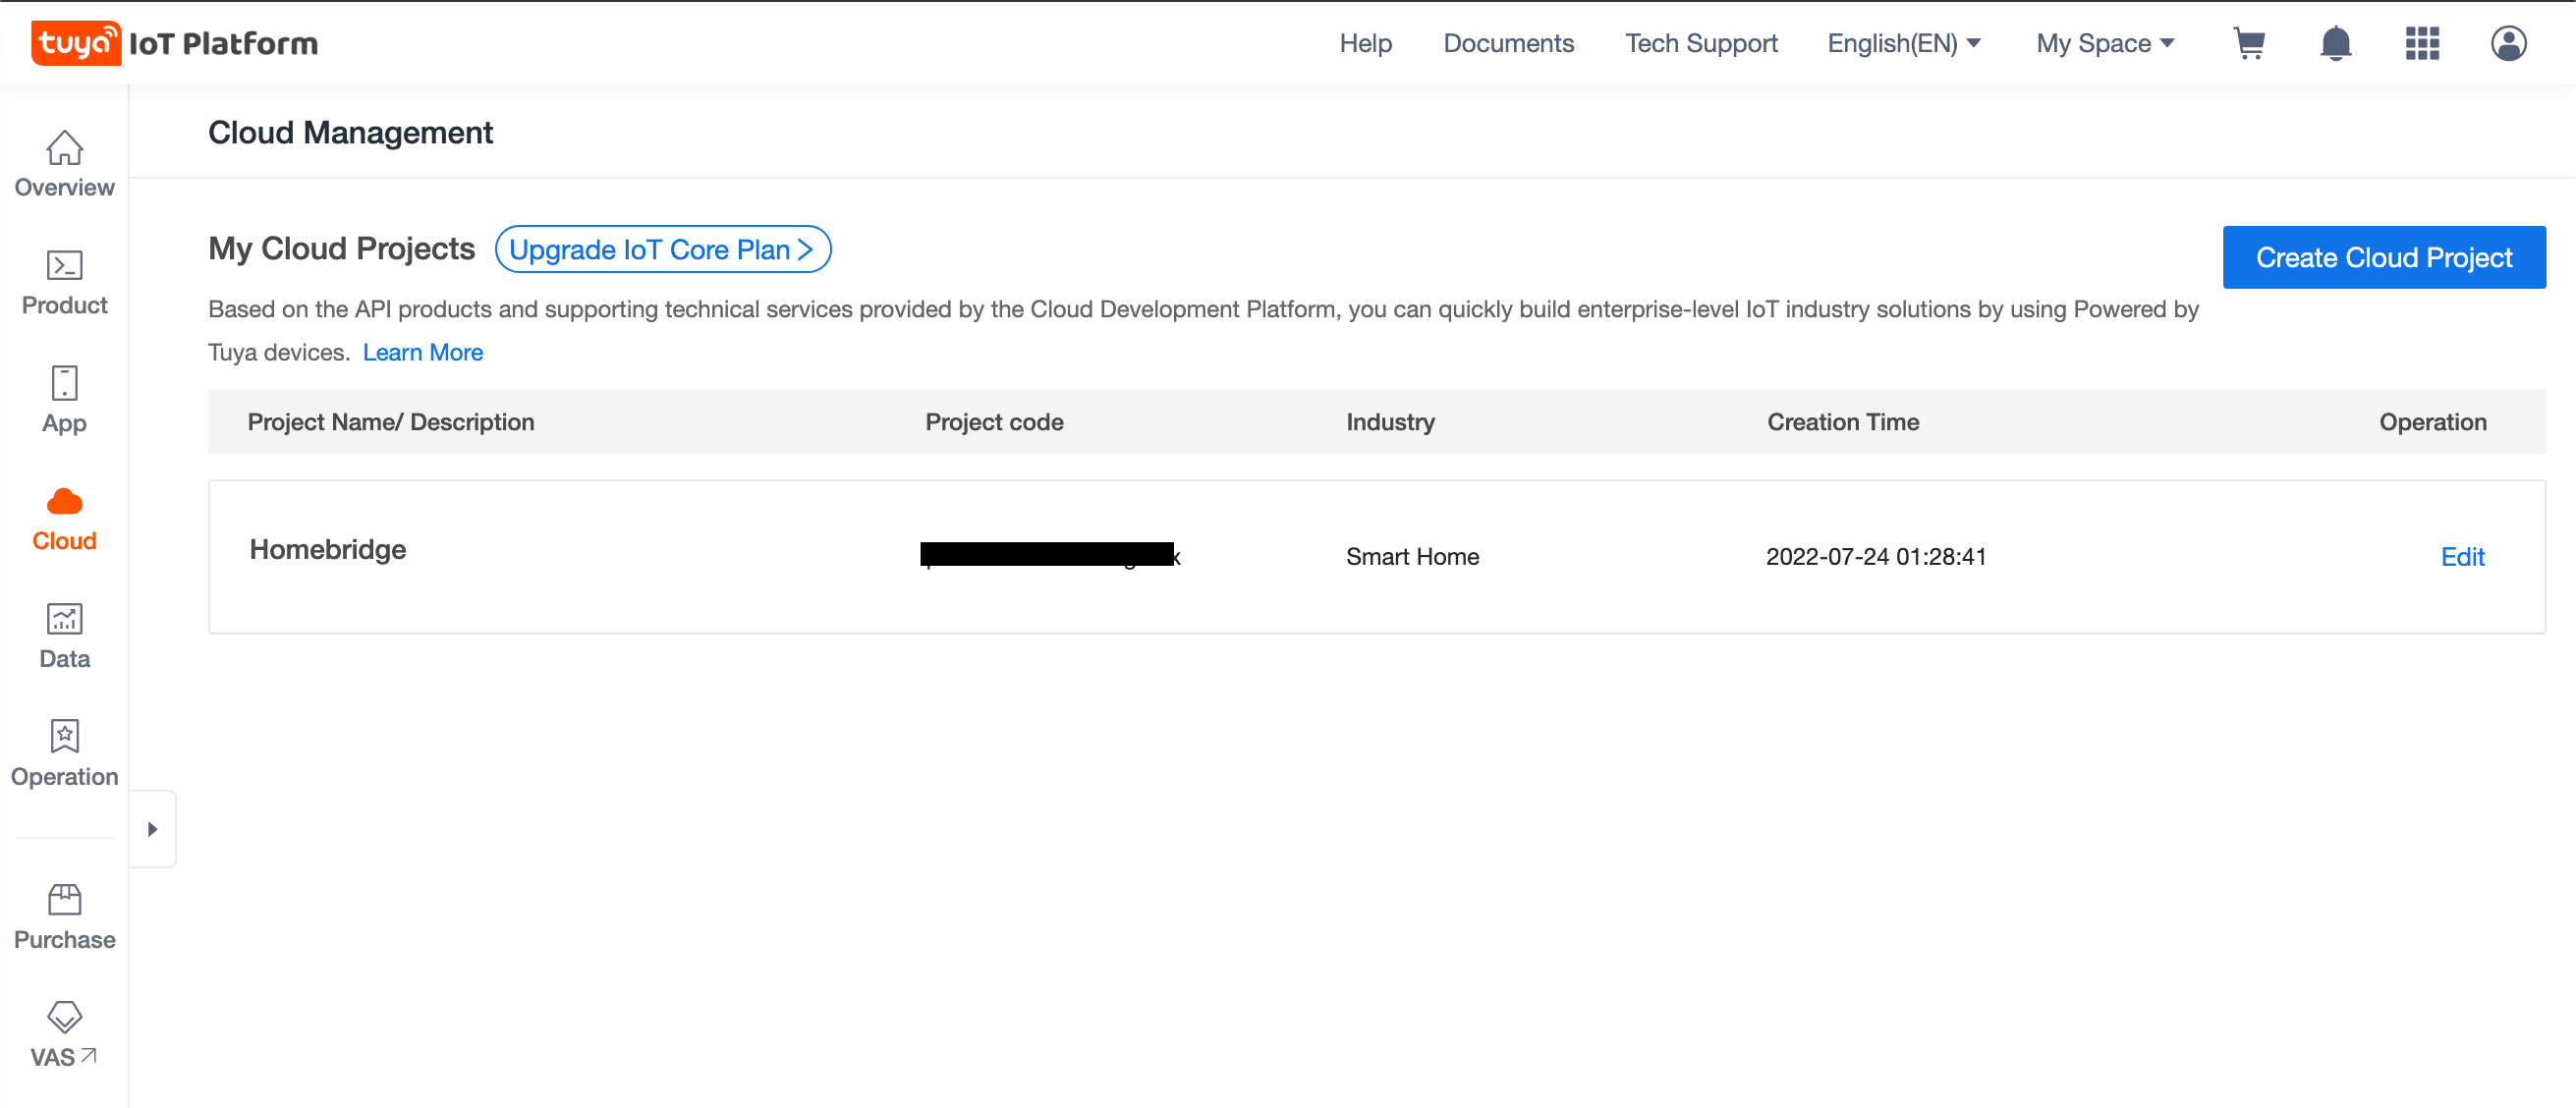
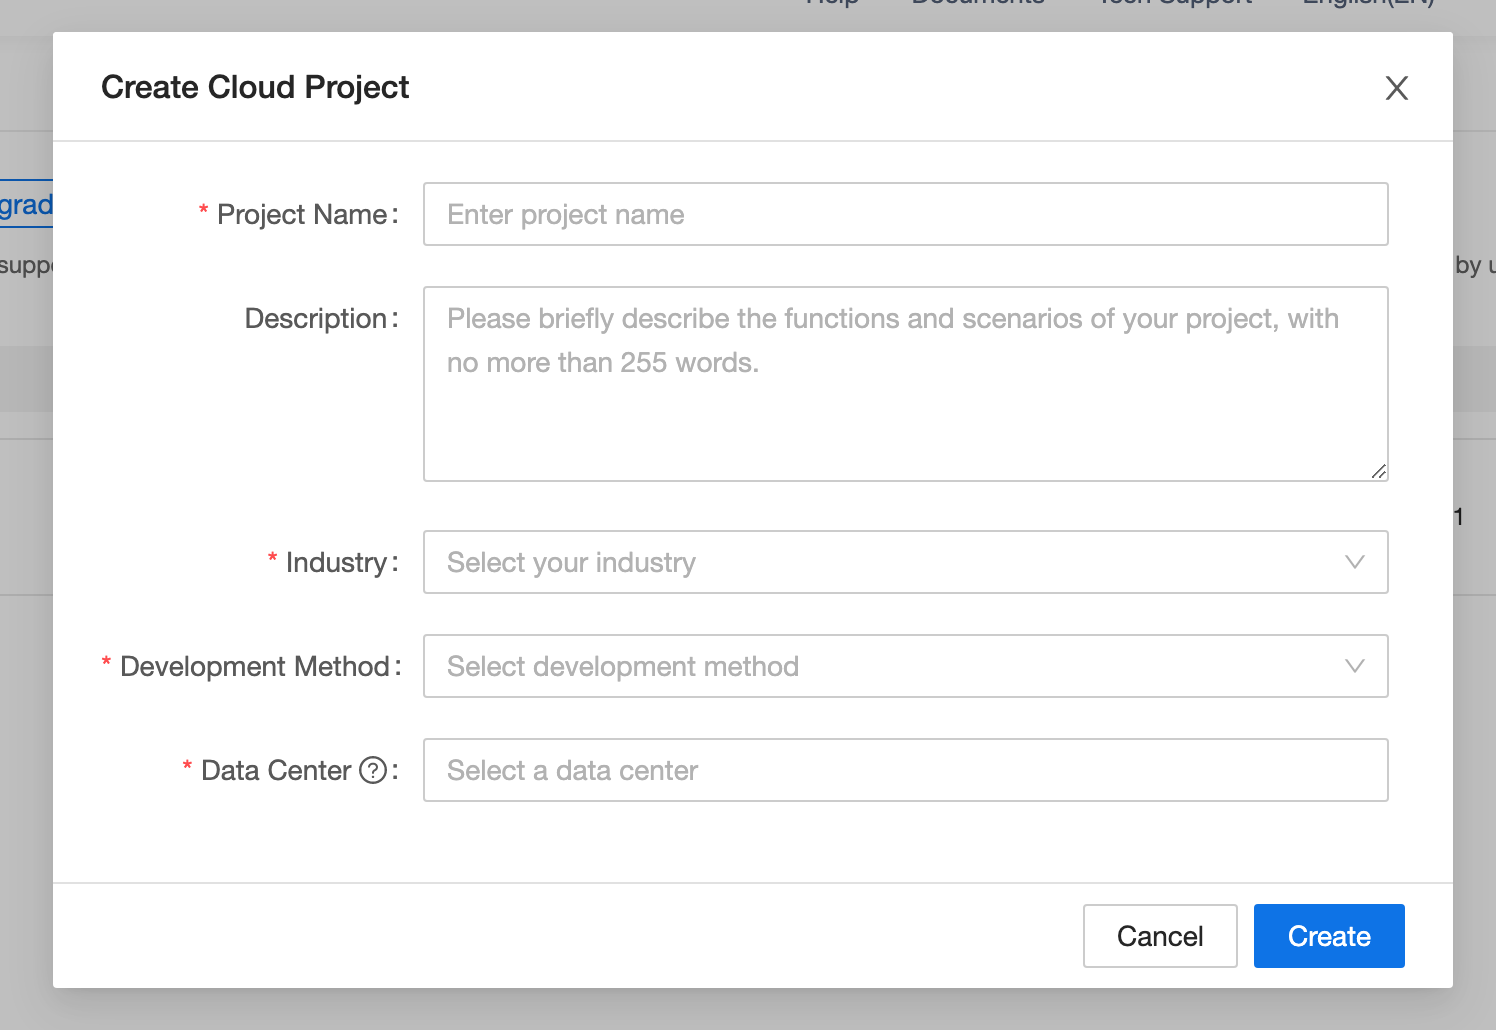
Log in to your Tuya Developer account, and click on Cloud on the left sidebar. Click on the Create Cloud Project to create a new project. Enter a name of your choice in the Project Name field, and select Smart Home from the Industry dropdown list. For the Development Method dropdown, select the Smart Home option. Select the data centres near you from the Data Center dropdown list and click on the Create button.
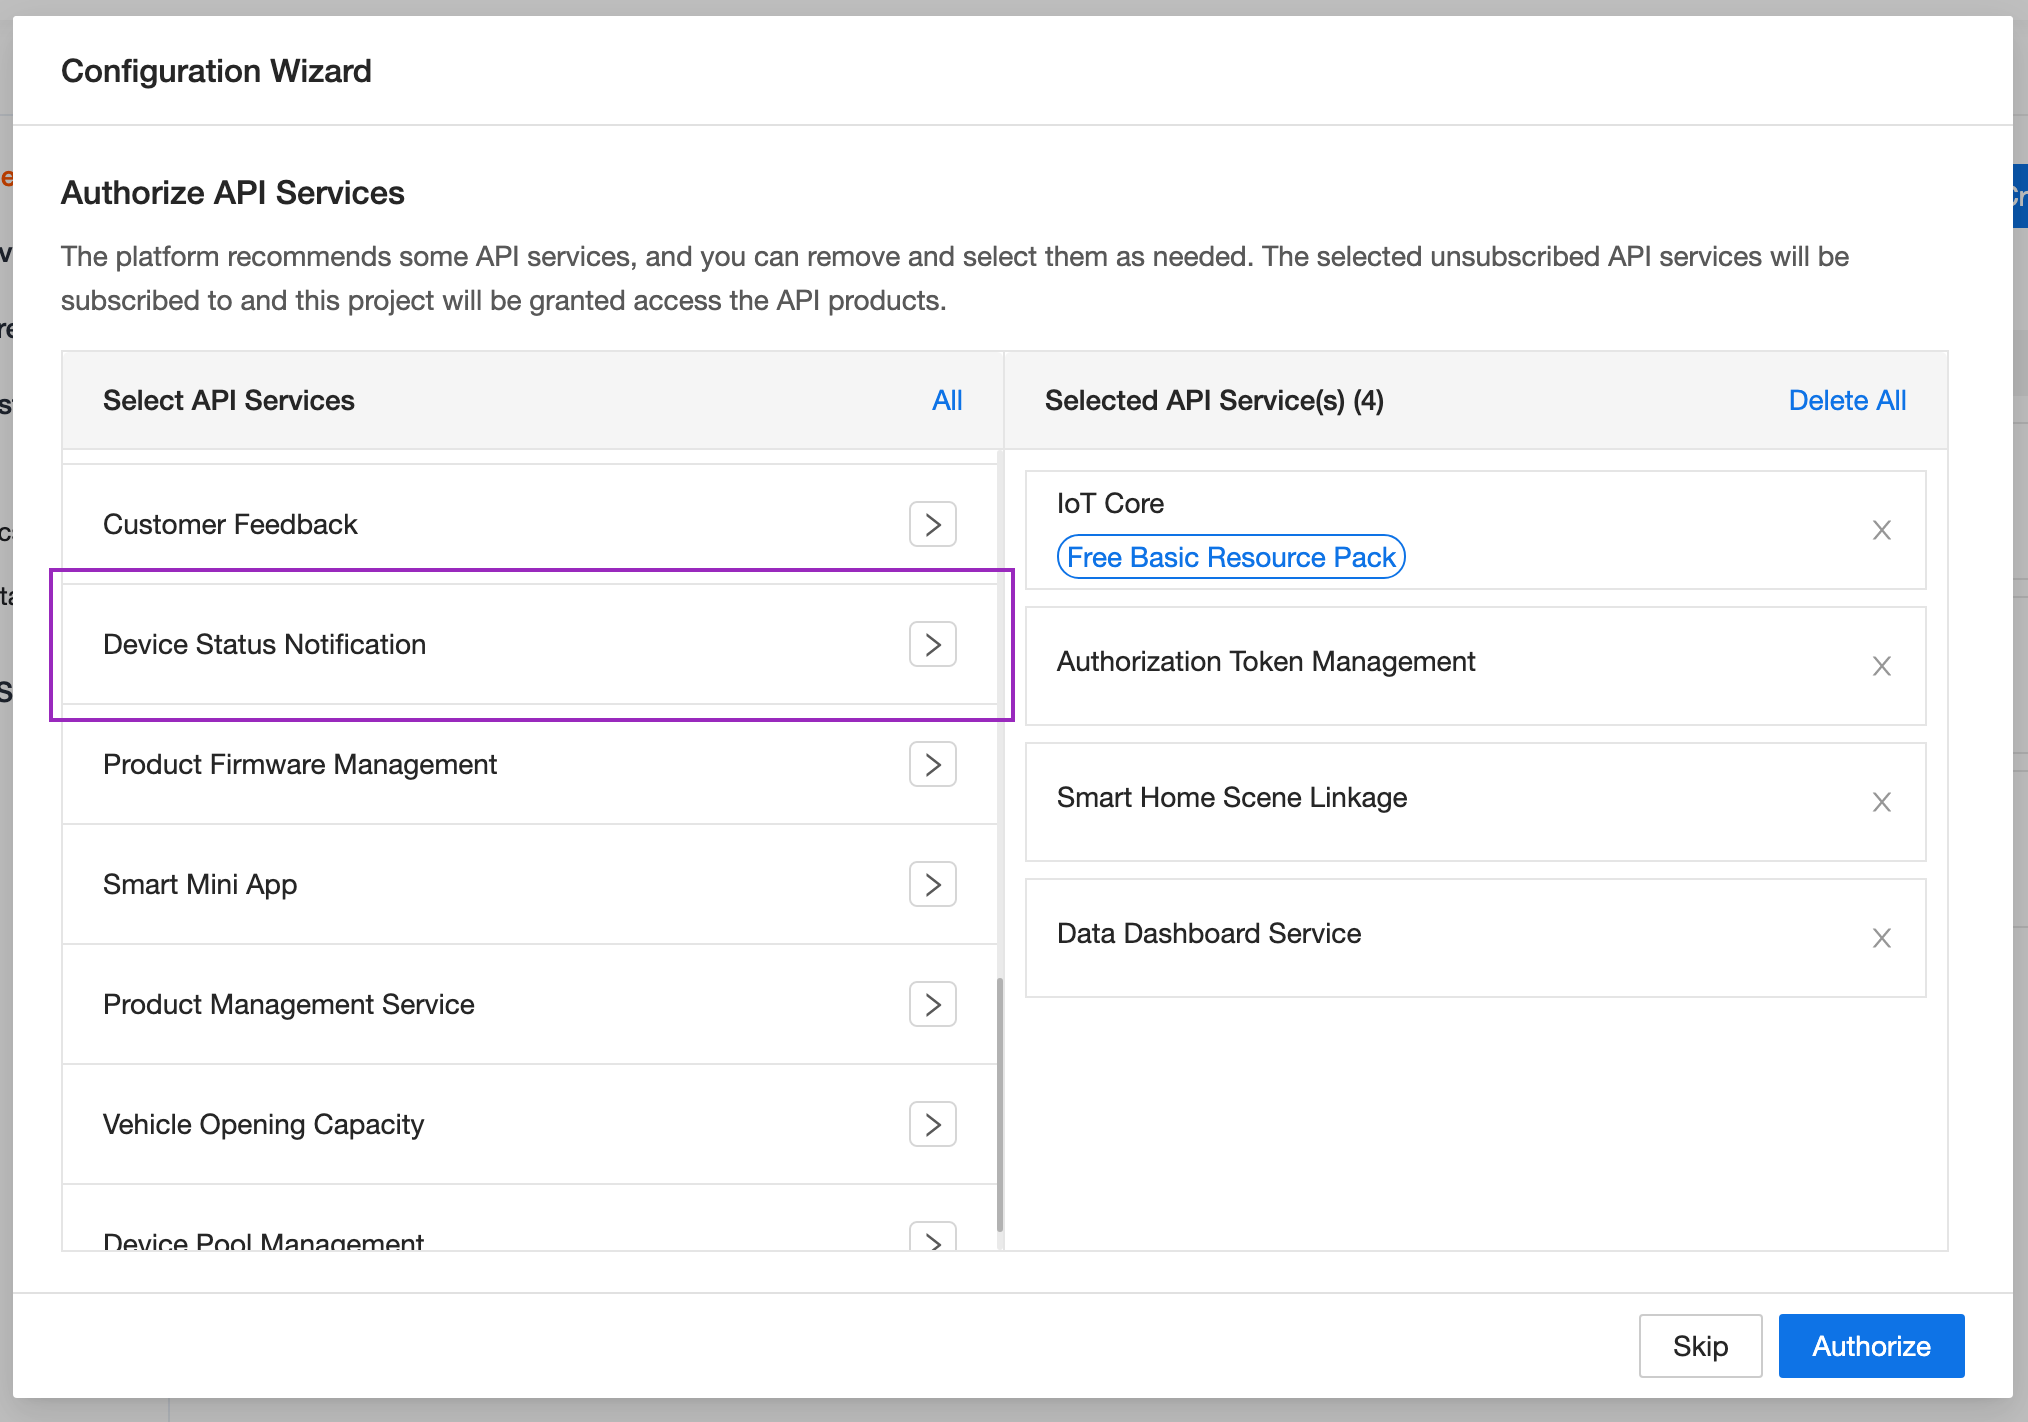
The next step is to select the API services that you need access to. By default, the platform already includes all the necessary services except one. Under the Select API Services section, select the Device Status Notification option and click on Authorize. You get redirected to your newly created cloud project.
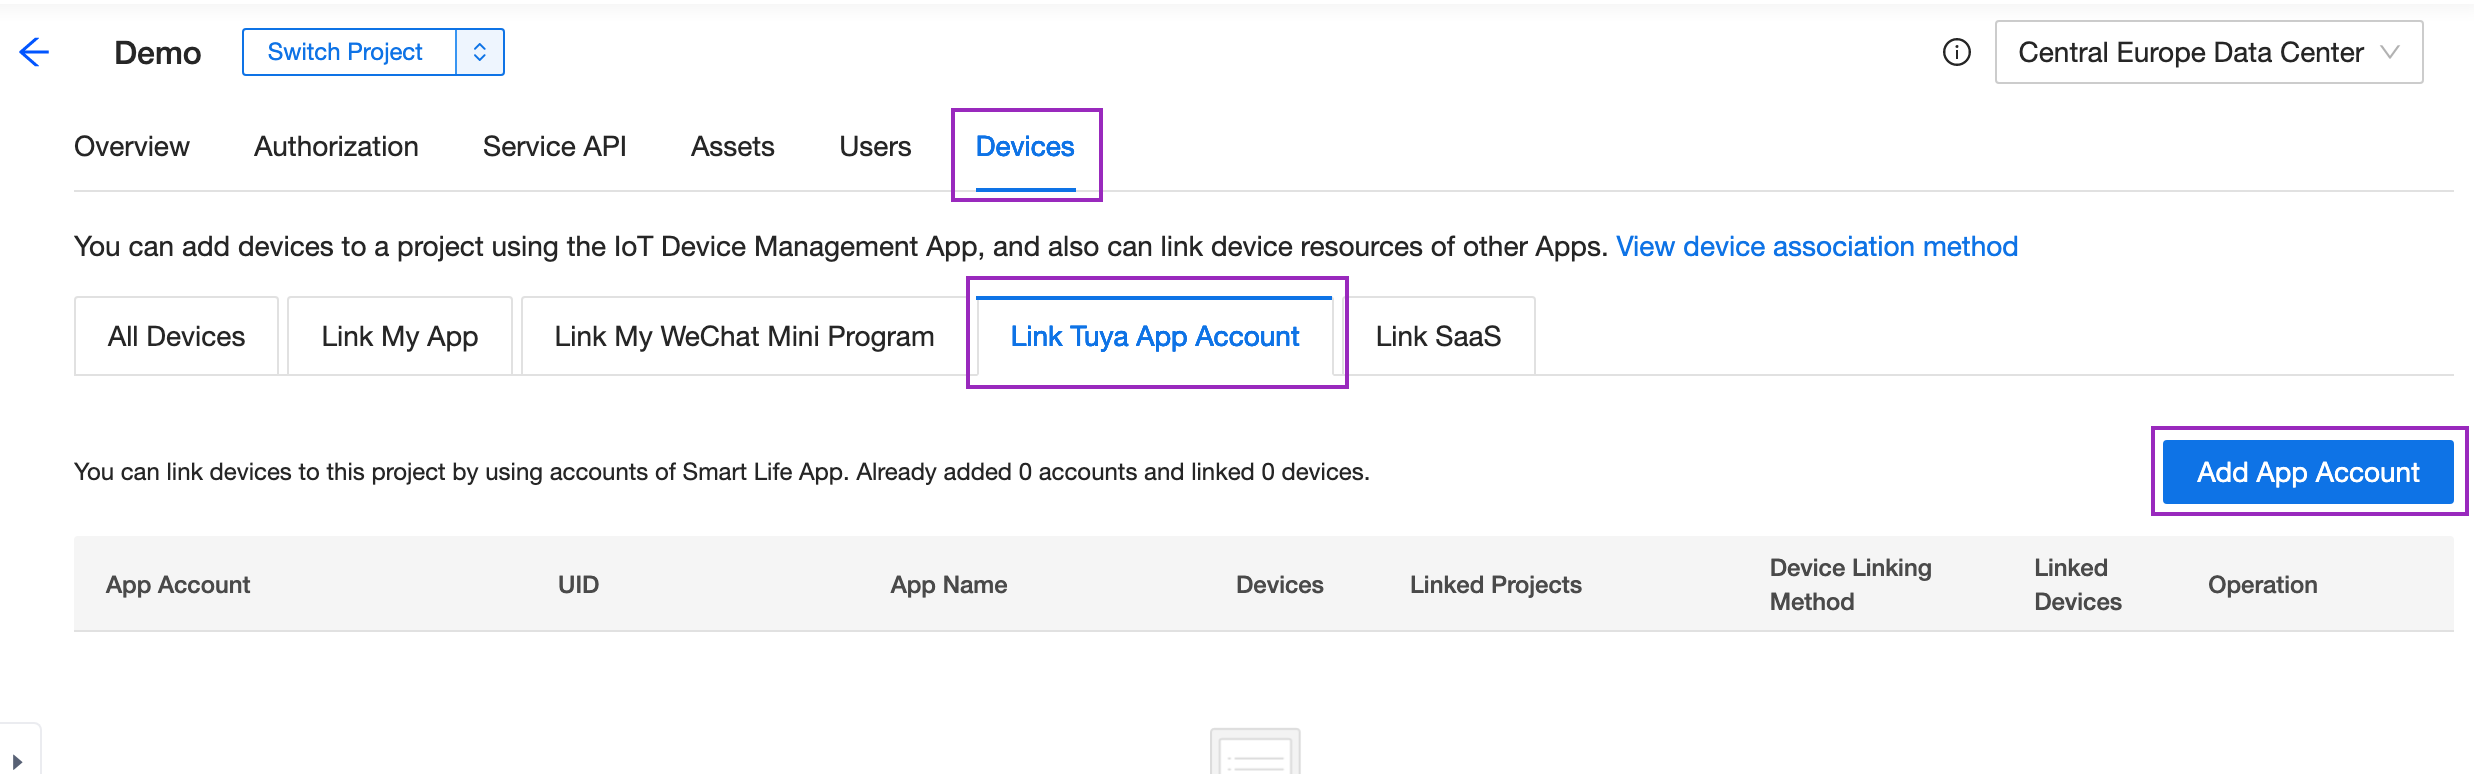
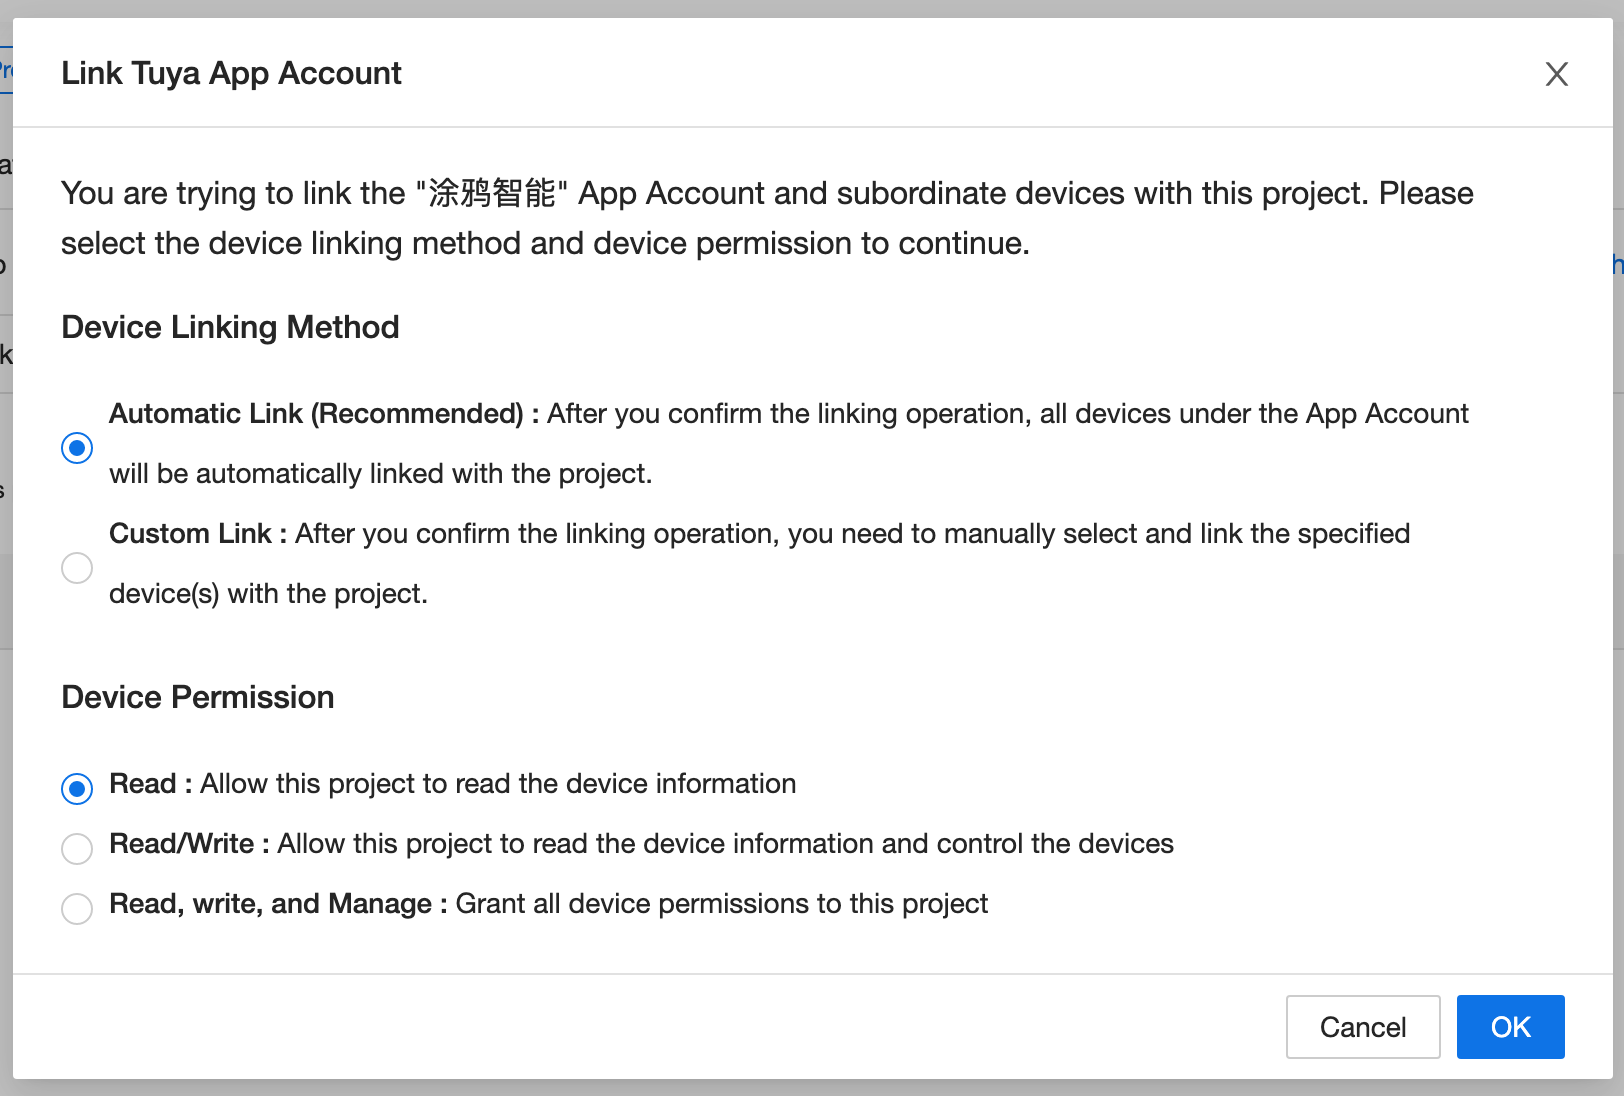
To add your bulb to this cloud project, click on the Devices tab. Select the Link Tuya App Account tab, and click on the Add App Account button. The platform will render a QR code. To scan the QR code, open the Tuya app on your phone. Click on the Me option on the bottom navigation bar, then click on the scan option on the top. Scan the QR code, and confirm the login.
Before adding your devices to your cloud project, the platform allows you to configure permissions for each device. For this tutorial, assuming you are linking a single device, leave the recommended option for the Device Linking Method. Under the Device Permission section, select the Read/Write option. This option will allow you to control the bulb. Click on OK and your devices will now get added. To check the linked devices, click on the All Devices tab.
Your bulb is now available on the Tuya IoT Development Platform. You can now access the device via the API. In the next step, you will install the Tuya plugin for Homebridge and configure it.
Add the Tuya Plugin to Homebridge
Till now, you can access the smart bulb via the Tuya app or by calling the Tuya API. In this section, you will learn how to configure a Tuya plugin and connect it with your Tuya Developer account.
If you haven’t already, install Homebridge on your Raspberry Pi, following the official documentation. When Homebridge is launched for the first time, you will be asked to create a username and a password. You will need this username and password to login into Homebridge. Hence, make sure you remember them.
To connect devices that don’t have official support for HomeKit, Homebridge allows you to use plugins. If a plugin isn’t available for a device you can create one, provided there is a way to interact with the device. Fortunately, there are various plugins available for Tuya-enabled devices. The Tuya team has also created an official plugin that you can check out here.
I have tried out a couple of plugins, and in this tutorial, I’ll share the one that I am using. The plugin works better than others that I’ve tested, however, it doesn’t always give the desired output. I might contribute to the plugin, and create one that works best for my bulbs. So keep an eye out for that!
On your Homebridge dashboard, click on the Plugins tab in the navigation bar. You will get redirected to the Plugins page, where you will find the Homebridge UI plugin already installed for you. This plugin allows you to configure various UI options for your Homebridge dashboard. You can also configure advanced options like Reverse Proxy, Session Timeout, etc.
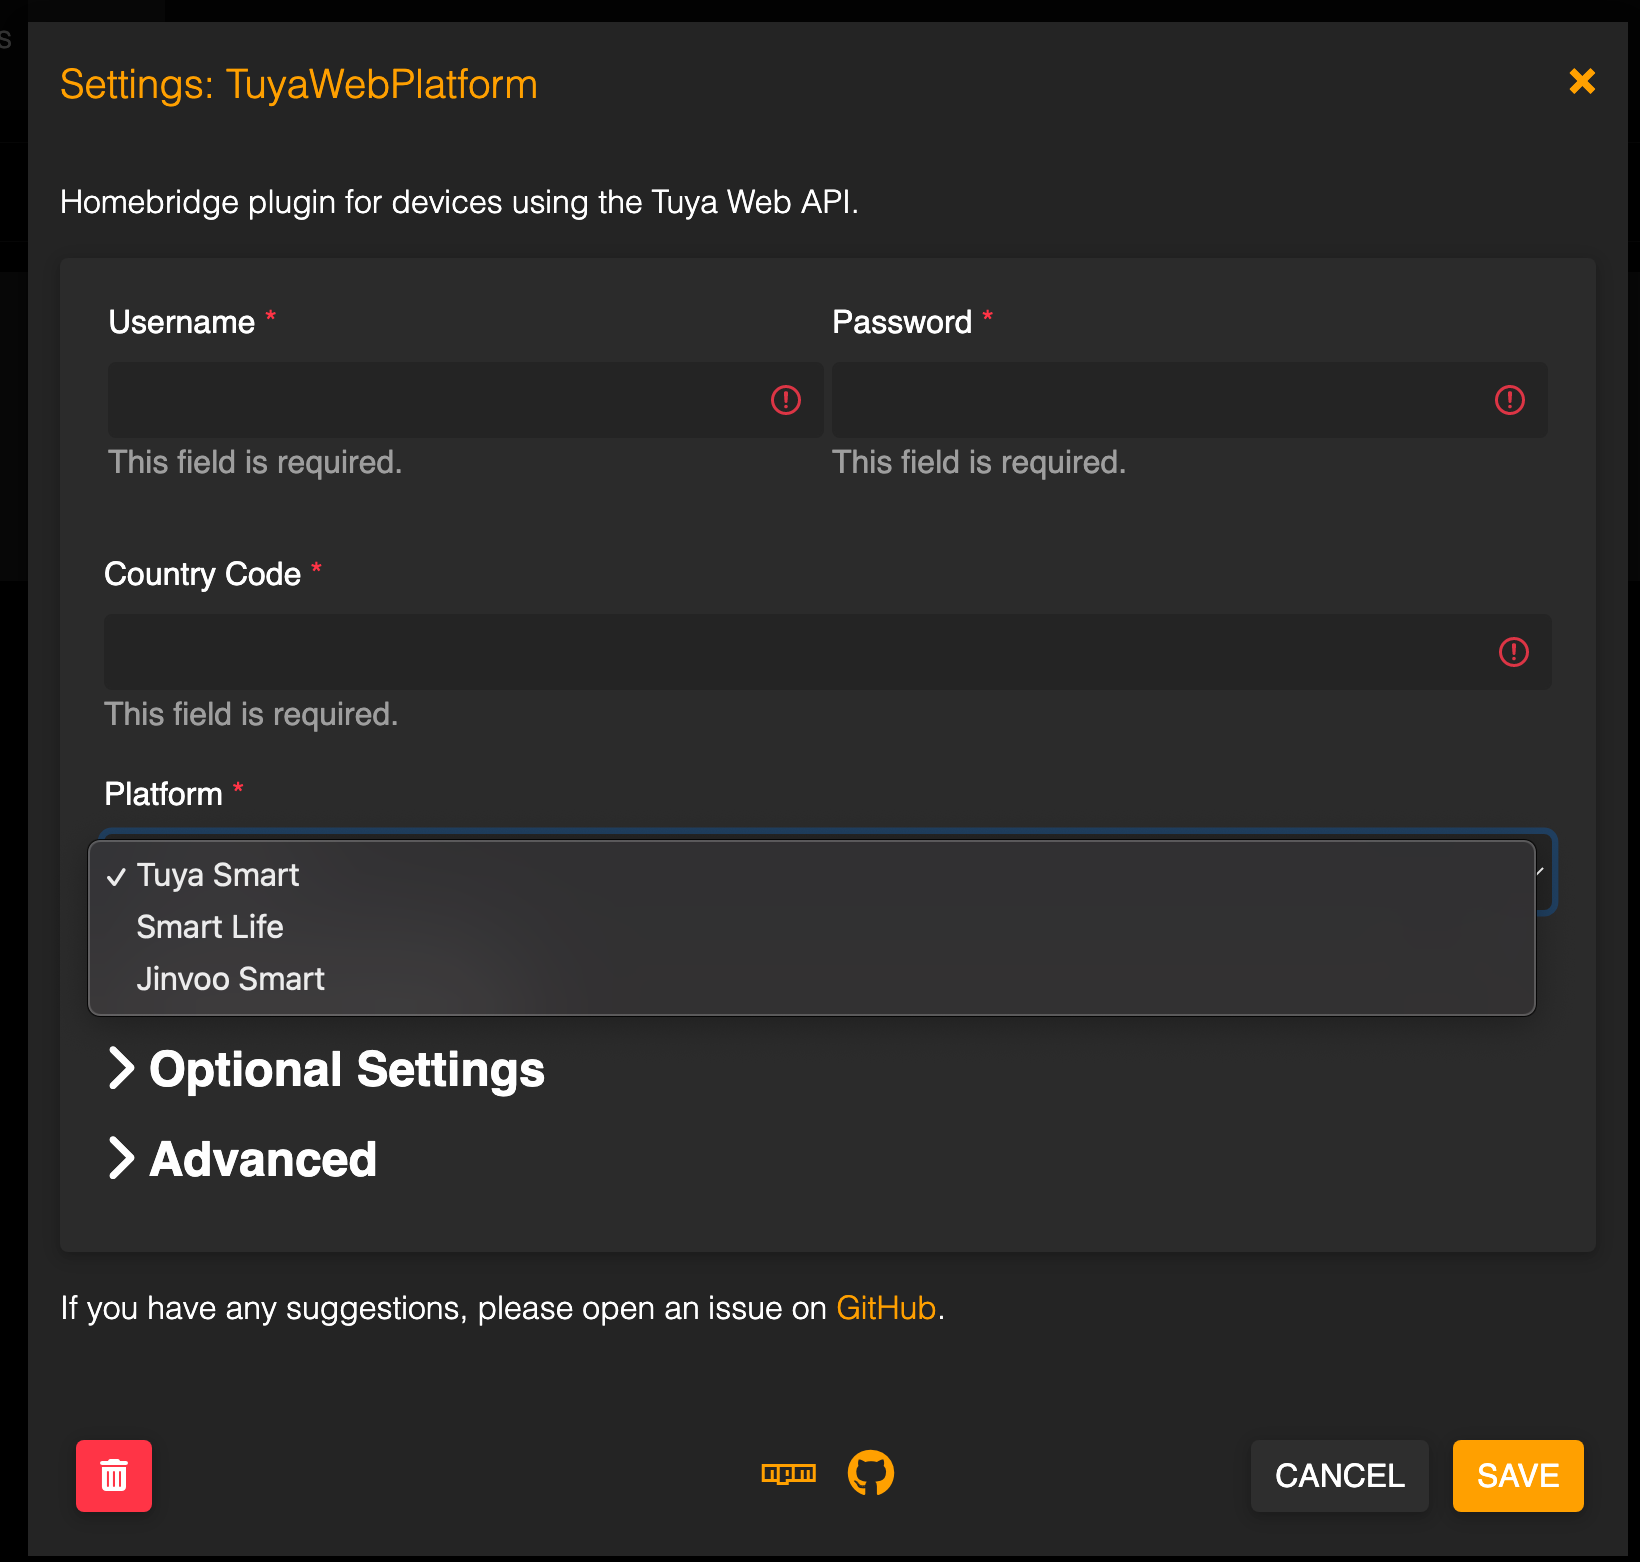
In the search bar, on the Plugins page, enter Tuya Web and hit enter. You will get a list of all the plugins that are created by the community for Tuya. Click on INSTALL for the TuyaWebPlatform (@milo526/homebridge-tuya-web), and Homebridge will install this plugin for you.
After the plugin gets installed successfully, you will need to configure and connect it with your Tuya Developer account. Enter the username and password you used for your Tuya Developer account, in the respective fields. Enter the country code (only numbers) in the Country Code field. Lastly, select Tuya Smart from the Platform dropdown list. If you have different types of devices, you can configure settings for each of them individually. You can also add scenes that you created in the Tuya app. For this tutorial, you can skip that part.
Click on the Save button to save the credentials. Every time you install and configure a plugin, you need to restart Homebridge. Click on the power icon in the navigation bar, and Homebridge will get restarted. You can also check the logs in Homebridge. Click on the Logs icon (next to the Power icon) to view the log. If the log doesn’t show any error, you should be able to view the device on the accessories page.
Navigate to the accessories page, and you should now see your newly added smart bulb. You can interact with the bulb from the accessories. However, that’s not our end goal. In the next section, you will learn how to access this bulb via Apple HomeKit.
Connect the Smart Bulb to Apple HomeKit
You can now access the bulb via Homebridge, and you’re just one step away from controlling it via HomeKit or even Siri. In this section, you will add Homebridge to Apple HomeKit, which will also add all the devices added to Homebridge to the HomeKit app.
On your iOS device, open the HomeKit app. Click on the plus icon, and select Add Accessory. By default, the app will ask you to scan a QR code to add the accessory. Go to your Homebridge dashboard, and scan the QR code displayed on the homepage. HomeKit will recognise it as a bridge and ask for your confirmation. Once you confirm, you will view all your devices in the HomeKit app.
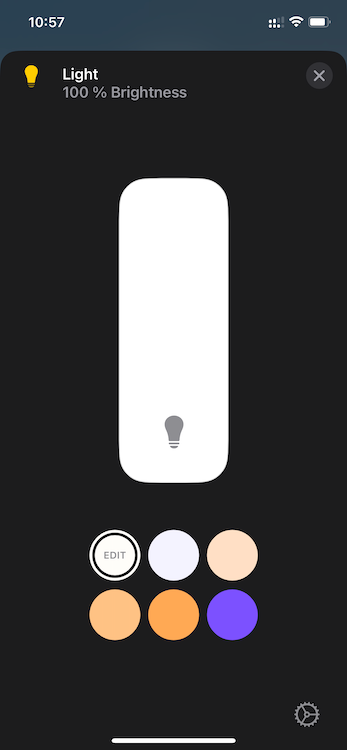
You can click on the device tile to turn it on/off. If you long-press the tile, you will be able to view other controls for your device. For example, for a smart bulb, you will be able to control the brightness of the light or even change the color!
Conclusion
Now that you’ve set up your first smart light, you can get more creative! You can configure scenes like morning, evening, party, reading etc. with pre-configured light settings. With one click, you get the lighting in your room based on your mood.
In my house, for almost all the rooms, I use smart bulbs. I’ve set up these rooms in the HomeKit app and added the respective bulbs to them. It allows me to interact with the lights via Siri easily. “Hey Siri, turn on the living room lights”, and the lights in my living room are on! I also created a couple of Shortcut apps that would turn the lights on/off based on certain conditions.
Even though the call gets still made to a cloud platform (Tuya), the devices are only accessed if your iOS device is connected to your local network. You can’t interact with the devices if you’re not on your local network, which makes the set-up secure. Ironically, it is a drawback as well! You can’t run automation based on location or check if any device is on when you’re not home. My next experiment will be to figure out a solution for this problem and share it with you all soon.
In the meantime, if you have any questions or want to nerd about automation, feel free to shoot me a message on Twitter!